Tuesday, November 30, 2010

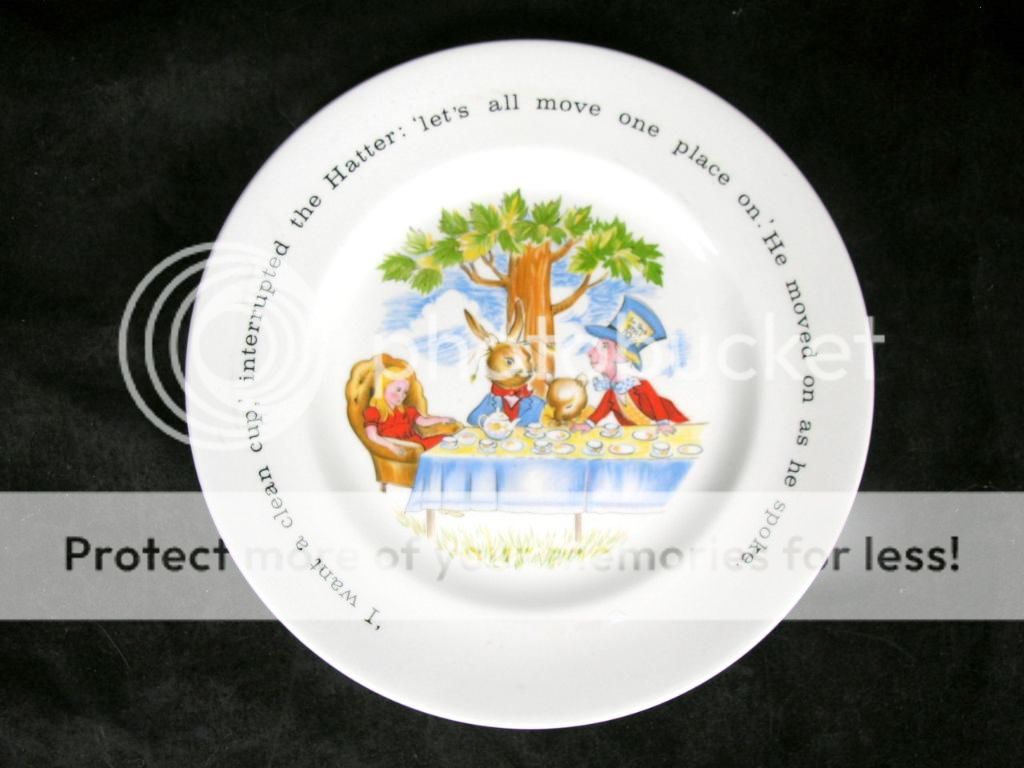
Alice in Wonderland China Patterns

If you haven't guessed by my Mad Hatter costume, I love Alice in Wonderland it was my favorite Disney movie growing up and on occasion I will still watch it today.  Yesterday when searching for more china pieces to match my Rose Chintz.  I found Johnson Brothers has a pattern called "Alice in Wonderland".


Paul Cardew also makes an interesting set, which I think I like more than Johnson Brothers, 


Such adorable patterns, but I love my Rose Chintz and I'm not sure the BF would like an Alice in Wonderland kitchen but maybe someday :).  Although the teapot would be an adorable piece just to have on its own!

Monday, November 29, 2010

My $10 Cherry Dresser all Fixed Up

So over my 4 day Thanksgiving weekend in between fighting off a cold and my sewing machine breaking (yes I'm devastated), I managed to finish both the projects of my dresser and the door headboard.  I am still deciding if I like the door headboard, it is on the wall. I don't like the pictures I took of it so I won't be sharing it today.  But I will be sharing the finished dresser.  After stripping it and sanding it down I stained it using a cherry finish.  I still have yet to find fixtures that I like for it, so I took some heavy navy seersucker scrap fabric and knotted it to make drawer pulls, which I actually really like, so I may work on creating a more permanent version of those to use.  It also is missing all the keyholes which I may make out of punched tin.


Now in regards to my sewing machine.  A wire is broken in the foot pedal, my wonderful BF spent a long time last night trying to fix it.  He had it working and then it quit :(.  I checked with Sears to see if you can order a new one and you can't, and they offer no other suggestions.  It just seems a shame to throw out the whole machine b/c of the foot pedal.  So I will be searching the internet to find a replacement and hopefully won't have to wait too long, I have so many Christmas projects waiting to be sewn!  So if anyone has an older Kenmore machine working or not and would like to get rid of the foot pedal, I would be happy to buy it from you!

Friday, November 26, 2010

♥ Art Deco Jewelry ♥

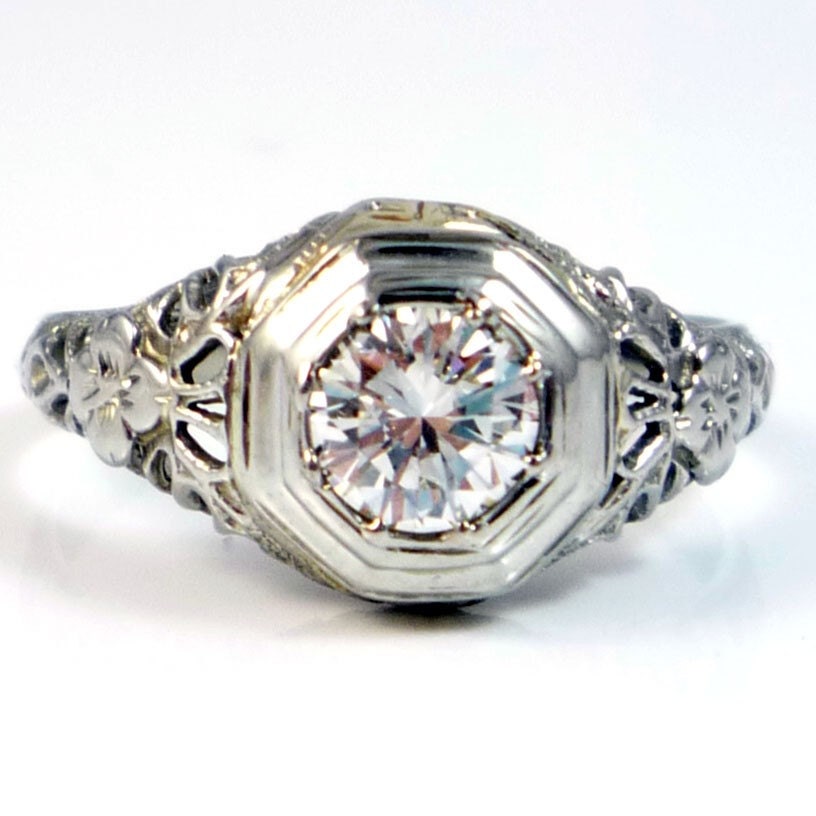
From the above title you can tell that I love Art Deco jewelry.  I think the pieces are classic and timeless, but also love that there is history that comes with them.  An antique Art Deco ring could have been someone's cherished wedding ring, how many hands wore this ring in the past?  I think I would rather have a beautiful piece of vintage jewelry versus a new one.  Who needs Kays!

18K Antique Art Deco Diamond Filigree Engagement Ring
Check out my Etsy Art Deco Love Treasury List for more great pieces. 

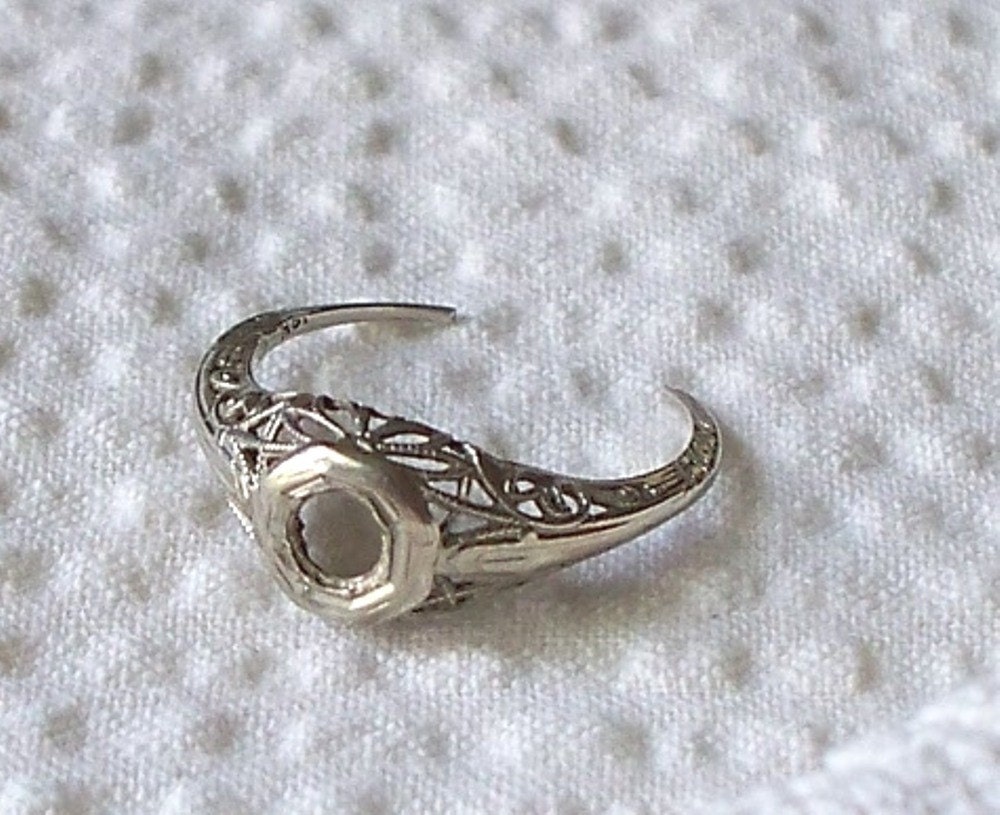
Now for my own Art Deco jewelry, I purchased this ring setting: 

Vintage deco ring 10K setting 1930s 40s

It was a risk and fortunately I didn't spend a lot b/c it is going to cost $160 to have it rebuilt by a local jewelry to hold a stone and fix the band.  Then I will have to find an old stone or purchase a new one for it.  Probably another expense for after Christmas, but I am excited to finally be able to wear it!  

Thursday, November 25, 2010

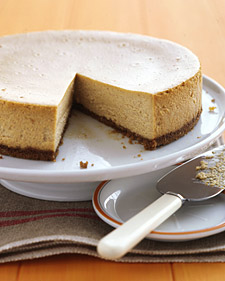
Happy Thanksgiving! Martha Stewart Pumpkin Cheesecake

For Thanksgiving this year I wanted to get away from traditional pumpkin pie. Not that we don't love pumpkin pie, like I've said before we love anything pumpkin, but I want to combine it with something else we really love cheesecake! What better day to indulge than Thanksiving! This year we are not having a traditional turkey and stuffing. We are having lasagna, I am making from scratch using spaghetti sauce I canned from roma tomato's I grew over the summer, and cheesy garlic bread. After that meal I'm not sure anyone will have room for cheesecake but we'll see.

Pumpkin Cheesecake

So for the cheesecake, I followed Martha Stewart's Pumpkin Cheesecake recipe with only one modification. Instead of using regular graham crackers for the crust, Honey Maid has gingerbread graham crackers which I thought would give this a little more flair. Also I didn't use pumpkin pie spice, I used cinnamon, ginger, allspice, cloves and a little nutmeg.

Wednesday, November 24, 2010

Freezing Apples Whole - Believe it or not It works!

Before I went to Virginia, I had purchased a 1/2 bushel of apples (I think its the right measurement, anyways it was a lot of apples).  Being busy with my projects as I always am, they sat in the fridge for quite awhile and then I realized that I needed to do something with them before my trip.  I didn't have time to peel and cut them up so after a little Google research I decided to freeze them whole. I washed them and then placed them on a cookie sheet and set them in the freezer overnight.  Once they were frozen I moved them to gallon freezer bags and but them back in the freezer.


I decided Monday night that I wanted applesauce and I figured it would be a good test run for the frozen apples b/c if they came out mushy it wouldn't really matter.  I filled the sink with hot water and took the apples out of the bag and floated them individually for about a minute.  Just enough to soften up the skin.  Then I peeled them which worked wonderfully and only requires your fingers, the skin peels right off leaving all of the apple behind.  The only small struggle was cutting and de-coring the apple b/c the middle was still a little frozen.  I would say all in all it balanced out b/c they took half the time to peel but a little longer to cut up.  I used my favorite Betty Crocker Applesauce recipe, very simple just add some brown sugar a little cinnamon and some nutmeg.   It was just as good as using fresh apples.  The apples stayed a little chunky and weren't just mush.  I will totally use them to make pies, crisp and cake, as well as anything else that requires apples.  At least this way you don't have to worry about the apples turning brown while freezing!

Check back tomorrow, I will be making, hopefully tonight or tomorrow morning, Martha Stewart's Pumpkin Cheesecake for Thanksgiving!

Tuesday, November 23, 2010

To Buy or Not to Buy that is the Question!

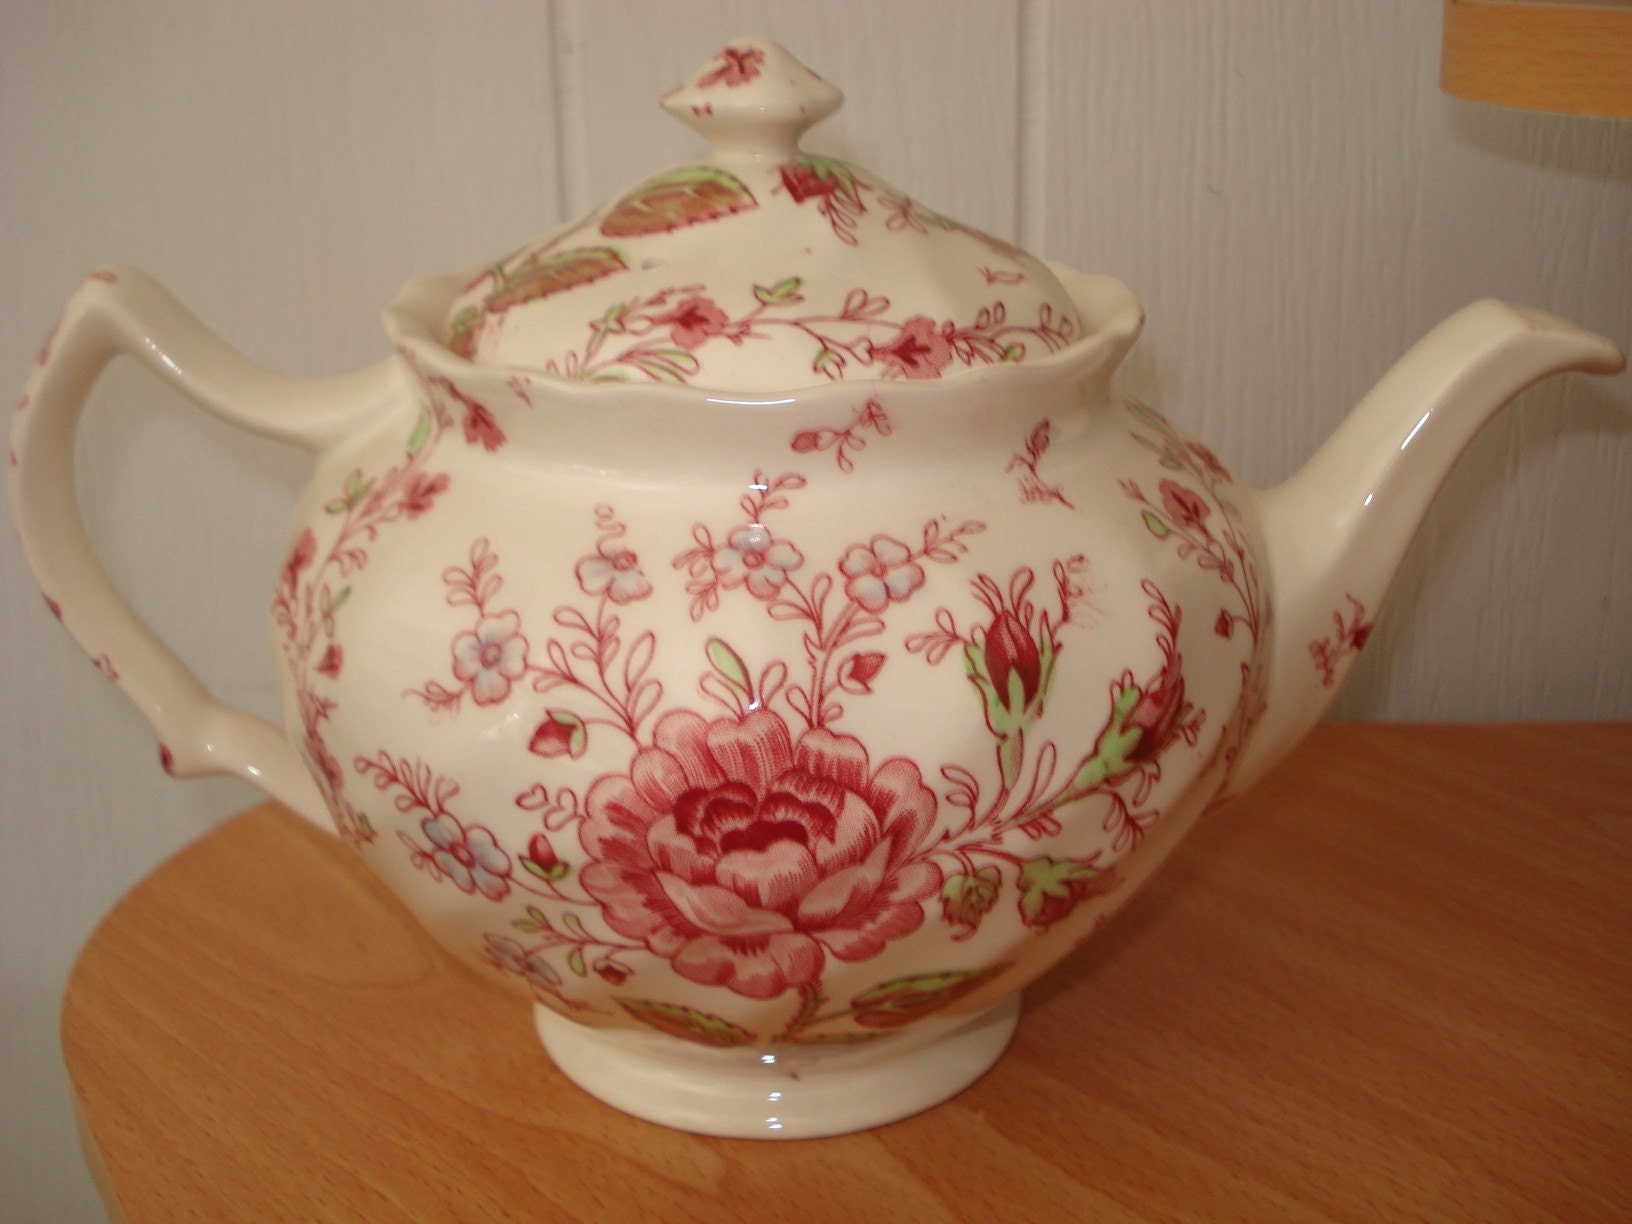
I am currently in quite a dilemma.  Being that it is a month before Christmas, I just found the teapot I have been looking for that matches the rest of my china pattern.  

Vintage 1950's Rare England Johnson Brothers Rose Chintz Tea Pot
Rare Johnson Brothers Rose Chintz Teapot
It is only $80 on Etsy and would round out my collection nicely.  But I'm not sure if I can spend $80 on myself right now, so I will just have to debate some more.  I had purchased from this seller before and the pieces were beautiful and in exceptional condition.  This seller also has many other great pieces I am missing, that I will have to keep watching: 

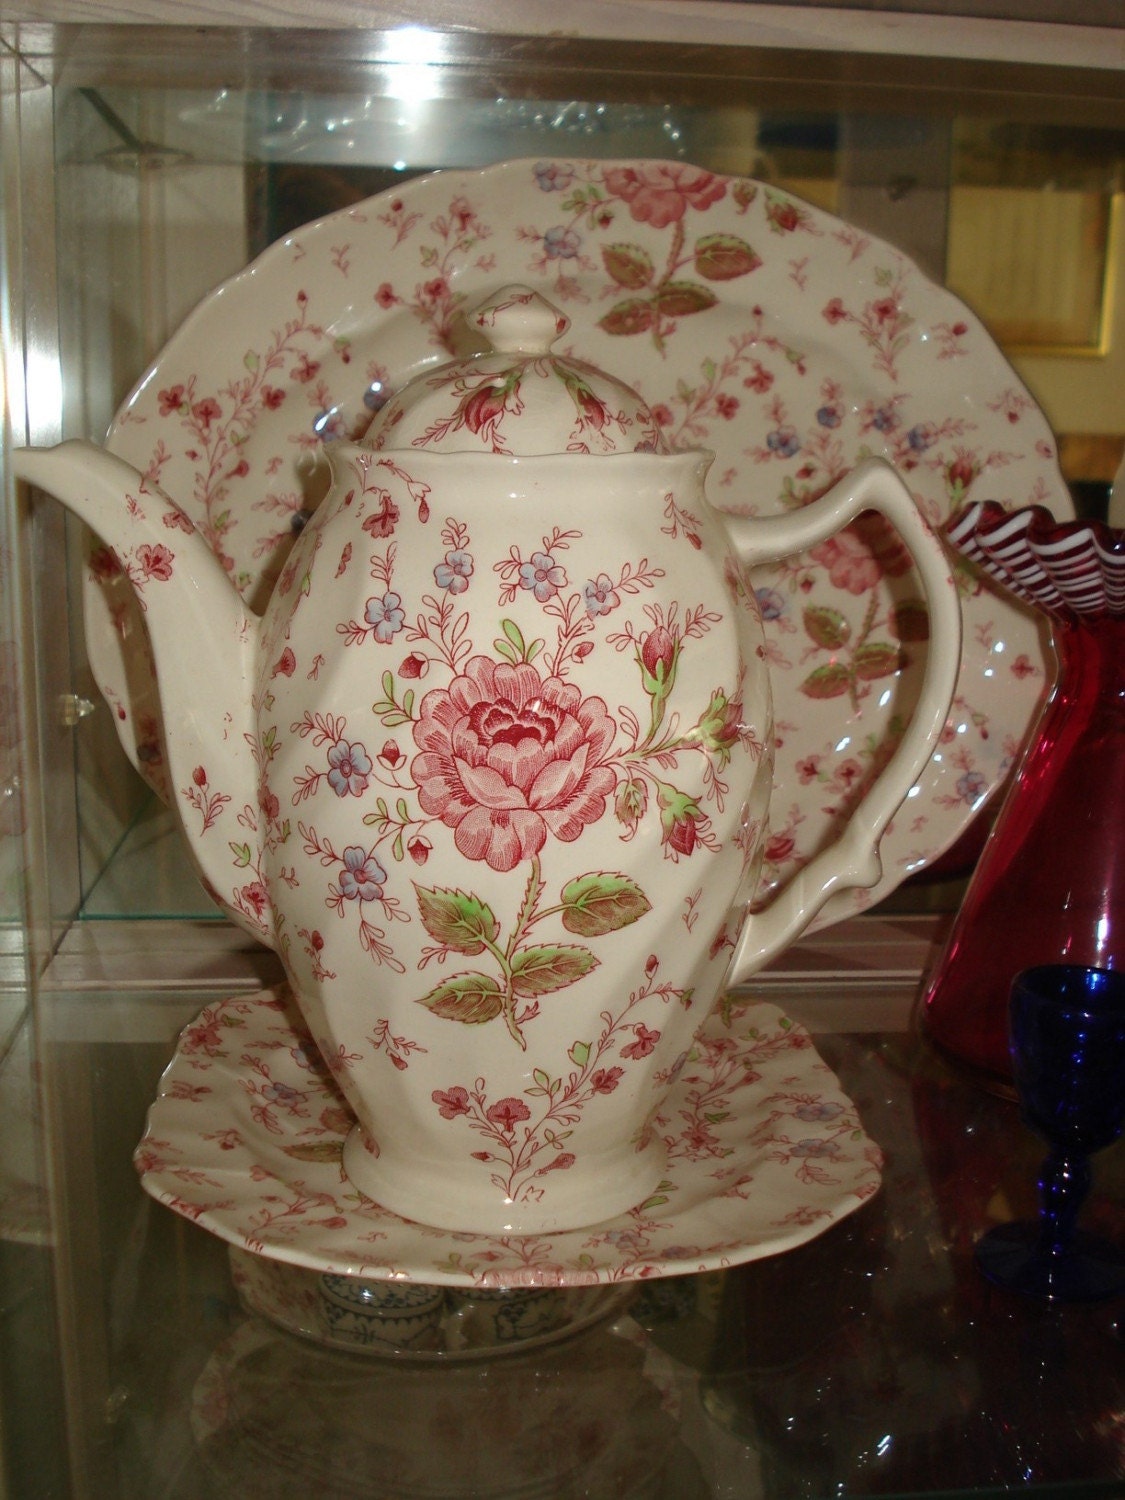
Vintage Rare Johnson Brothers Rose Chintz Coffee Pot Excellent Condition
Rare Johnson Brothers Coffee Pot
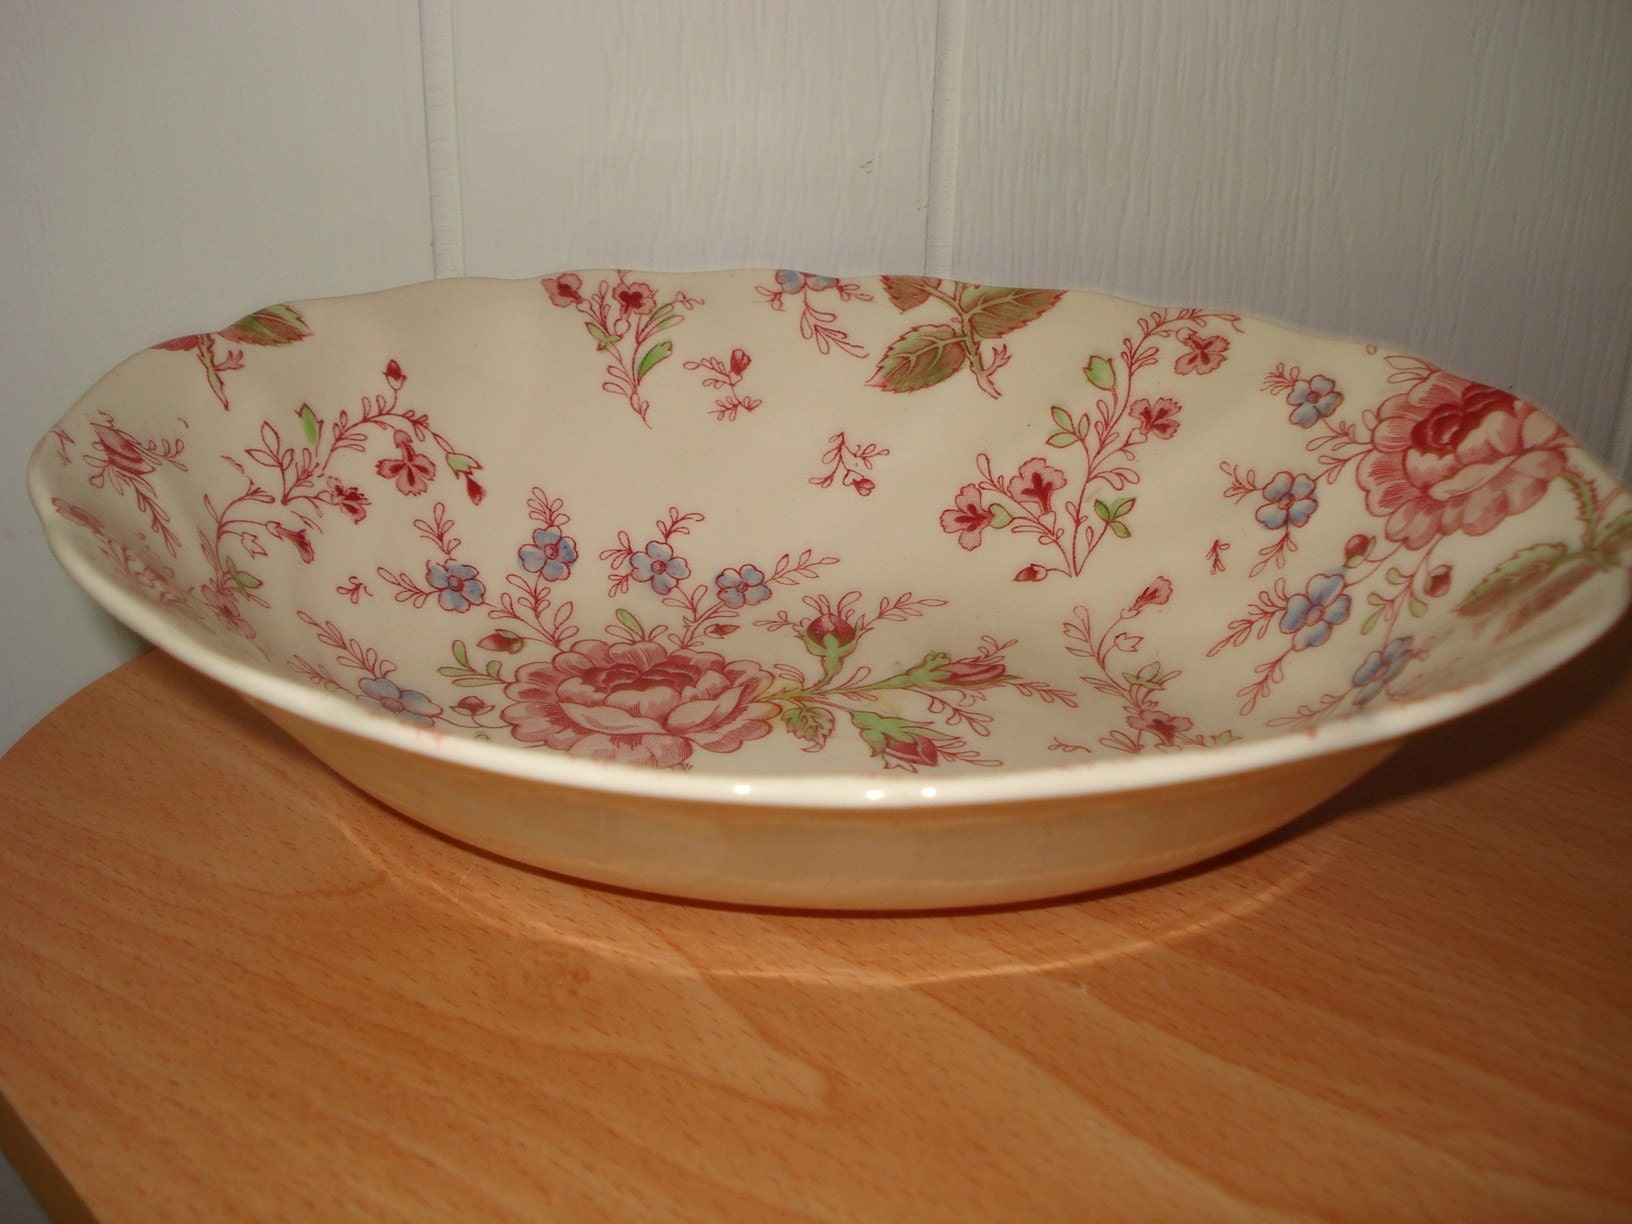
Vintage 1950's Rare England Johnson Brothers Rose Chintz Oval Serving Dish Bowl
Rare Johnson Brothers Oval Serving Dish
So I guess I will just let out a **Big Sigh** and hope they are still there after christmas!

Monday, November 22, 2010

Flea Market Find: Upcycled Door Headboard

Remember the old wood door I got for $5 at the antique shop?  Well I finally have it almost finished.  After having to use Formsby's Paint and Poly Remover on it twice and having the BF pressure wash it, most of the 3 layers of paint finally came off.  And then it just had to be sanded to get the green hue out of the wood.  The pictures below are with one coat of cherry stain.  There is still some work to be done in corners and what not, but I am very happy with how it turned out. 


As you can see it still needs some sanding on the ends as well as in the panels, but I think the panels will have to wait until I get my Dremel Rotary tool for Christmas, until then I will hang it up as is, which I am still figuring that part out!  Now all I need to find is an old door knob and some skeleton keys to complete the look!

Friday, November 19, 2010

♥ Upcycled Vintage Jewelry ♥

Remember the rhinestone jewelry I got at the flea market awhile back?  I finally created something out of it.  I have a wedding to attend this weekend and needed a little bling.  Big chunky rhinestone jewelry seems to be making a comeback, so what better than to find some old vintage jewelry and re-use it. 


So I created the rosette headband, using an old headband I had hanging around as well as some satin and some black netting.  I used the vintage earrings, just took the backs off them and hot glued them to the headband.  I didn't have the heart to tear them apart and they look very nice whole.  So total cost of the headband was $3.

I also created an elastic ruffled bracelet out of the brooch, again out of scraps, I am not sure how crazy I am about this but we'll see if I actually wear it.  The cost of the bracelet was $3.  

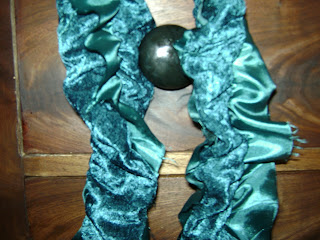
Lastly since it is only going to be in the 30s this weekend.  I made this ruffled scarf out of velvet and satin.  It is so soft and very luxurious looking and will definitely help keep me warm!  Have a good weekend everyone, I know I will!


Thursday, November 18, 2010

A True Upcycling Artist: Paul Villinksi

I found Paul Villinksi's art through Gossip Girl.  If any of you watch Gossip Girl, the butterfly wall art in Serena's bedroom that Blair setup for her is by Paul Villinksi.

Picture from CW
The butterflies above were created out of recycled cans.

Check out his other creations at http://www.paulvillinski.com/artwork/beercan.html.   

Wednesday, November 17, 2010

Peppermint & Patchouli

This past weekend, I decided to try to make my own candles.  I had purchased the supplies awhile ago and had not gotten around to give it a try.  I chose to use soy wax b/c it is easier to melt using the microwave and cleans up with soap and water.  Being rather clumsy, sometimes I tend to shy away from things that can burn me horribly, but this actually went very well with only one small burn on my hand, but that was my own stupidity.  I ordered my supplies from Creative Illuminations , they were cheaper on the cost of the soy flakes but shipping costs were rather high so I may look into an option closer to home.  If anyone knows where you can get soy candle making supplies in Northern NY, please let me know.

So this is what you will need:


1 lb of soy wax flakes (I got the 135 b/c it was recommended for containers)
1 oz fragrance (I love Peppermint)
Clean and Dry Jar (I used an old Ball Jar b/c I love the look of them)
Cotton Wicks
Optional - Dye Block (I used Fire Engine Red)
At least a 2 cup Pyrex measuring cup
Glue

I started by gluing the tab the wick is to the center inside of the jar.  Super Glue should probably be used, but on several occassions super glue and I have had disagreements and somehow I end up gluing my fingers together, so I stuck with Elmers :).  Let the glue dry fully, if you are impatient like me get the blow dryer out.

Place half the soy wax flakes in your Pyrex measuring cup and microwave for five minutes.  Use caution b/c the measuring cup will be extremely hot (how i burned myself)  The flakes should be completely melted add the rest of your 1lb bag of flakes, stir together and microwave for another 5 minutes.

Add your entire 1 oz bottle of fragrance (1lb of wax needs 1 oz of fragrance) and stir together.

If you want to color your candle, place the dye block (i only used half) in a coffee mug and microwave until it is melted (about 1 min) and add to the fragrance/wax mixture.

Now it is time to pour.  Use the spout on the measuring cup to slowly pour the wax into the jar.  I poured until it is 1/2 inch from the top.  Then I realized that I still had wax left so I quickly prepared a votive container and poured the rest into it as well.

To center the wick, I found it was easiest to attach a clothespin to the top of the wick (which I dropped the clothespin in the wax and had to fish out before I finally got this to work)  And then just lay the clothespin over the top of the jar in the center and leave it until the wax has settled.

:) notice the clothespin is a little red
The finished product:


I also made a second batch that went 10x smoother, but I used Patchouli fragrance instead and left the candles white. The process was very easy and quick and the candles burn nicely and throw the fragrance very well.  All in all for just the supplies which made 2 ball jar candles and 2 smaller votive size candles, it cost about $15 (without the shipping).  So if I can find this closer to home, I will definitely be making all my own candles.  It is a great way to recycle old jars as well.  Also if you want to make tarts for your melter, the wax can be reused and re-fragranced over and over.  The next time I'm going to try to swirl the color!

Makes a great Christmas gift!  Give it a try!

Tuesday, November 16, 2010

Ooops I had a long weekend :) - Homemade Marshmallows

Sorry for missing yesterday's post.  I took Monday off to take my dogs to the vet and spend some time with the BF.  Over the weekend I worked on a lot of great projects, that I will share this week.  For all of you who have not had a homemade marshmallow before you will never go back to store bought ones again.  Last year for Christmas I made peppermint marshmallows and gave them as gifts to people with hot chocolate, they were delicious.  This year for my first batch I wanted to try the traditional vanilla recipe and of course they were just as wonderful.

Vanilla Marshmallows
Homemade Marshmallows (Courtesy of Martha Stewart)

The recipe is used is from Martha Stewart.  The recipe is very simple, the only word of caution I have is to be careful it gets very hot and that it is best to use a stand-up mixer like a Kitchen Aid b/c it will take require a lot of mixing.  I hope you enjoy them!

Friday, November 12, 2010

Happy Weekend and Things that Make Me Smile :)

So this blog post may be a little off the wall but I felt like smiling today and I hope it inspires others to think about what makes them smile!

As a continuation to yesterdays post about pumpkin pancakes making me smile, I've decided to continue on this topic with other things that make smile.

Everyday I look at this and I smile:


I smile b/c the hutch that my lovely original Johnson Brothers Rose Chintz is in, was in my grandmothers house for as long as I can remember.  Also my time and enjoyment spent collecting these pieces.  My first pieces where purchased at an antique shop on a trip to North Carolina, some purchased from various shops on Etsy and some as gifts.  I am now only missing a few pieces to finish my collection :).  There is a lot of history sitting in the corner of our dining room!

Recycling also makes me smile.  Every time I can take something others would throw out and re-use it I smile.

Upcycled Bed Spring Pumpkin
Upcycled Bed Sheet Scarf
T-Shirt Yarn iPod cozy
T-Shirt Yarn Rug
Upcycled Bed Spring Heart

Recycled Bertolli Firefly Jar (Glows in the Dark)
Of course there are plenty of other things that make me smile, my BF and my dogs (Annie and Bubba) make me smile daily.  If you need something to make you smile, check out my "Be Merry" banner:

Burlap triangles with painted green glittered letters on red gingham ribbon
For sale in my Etsy shop: springsnthings.etsy.com

Hope you have a great weekend!  Be prepared to see some great projects next week!

Thursday, November 11, 2010

Pumpkin Pancakes make me smile :)

After returning from Charlottesville, VA I really just wanted comfort food. The BF and I totally love anything pumpkin, so on recommendation from a friend we made Martha Stewart's Pumpkin Pancakes.  The only addition I made to them was adding chocolate chips.  Butter and maple syrup to top them off and they were delicious.  Nothing better to make you feel at home than pancakes!

Pumpkin Pancakes
Image from marthastewart.com

Give it a try! I hope you enjoy them as much as we did!  I am going to make them again this Sunday for Breakfast.   Happy Veterans Day!

Tuesday, November 9, 2010

So I lied I ended up making something....

I am probably one of the only people who travel with a giant crochet hook and balls of hand-dyed sheet yarn.  I haven't worked anymore on the rugs I am making out of the sheet yarn, but I did find a nice yarn store called The Needle Lady.  I found some very nice chunky weight charcoal gray wool and I crocheted an infinity cowl out of it last night and still have a lot left for another project.

The Great Yarn
The Great Infinity Cowl
Just some pics of Historic Downtown Charlottesville: 


This is actually a Hockey Arena


The Omni Charlottesville:

The fountain in the lobby


Monday, November 8, 2010

Vintage Soda Box Love - Message 2

I left yesterday for a conference in Charlottesville, VA.  So I probably won't be creating too much in the next few days, but will definitely be checking out some cool antique shops in Historic Downtown Charlottesville.  Check back for pictures!

I just wanted to share what I left on my chalkboard blocks in my vintage soda box for the BF while I'm gone.

Sorry this picture is a little blurry.  I took it on my Blackberry quickly before leaving. 

Friday, November 5, 2010

Happy Friday - Upcycled Men's Wool Blazer Ruffled Scarf

Yesterday I went to the North Country Neighbors Flea Market in Potsdam and as always found some great deals.  I bought an old mens size 1x Wool Blazer (sport jacket, whatever) for I believe $4 dollars, it ended up being less than it was marked when I got it to the register.  It had several different colors and styles of plaid and hounds tooth in it, so I figured it would make a cute scarf. I ripped it apart and cut it into strips and crochet them which I didn't like the end result, so I cut apart the sleeves and used them to make a ruffled scarf.  I had to cut the sleeves into strips and then sew them into one long piece (there is still a lot of the sleeve left).  Here is the result:


sorry this one is a little blurry


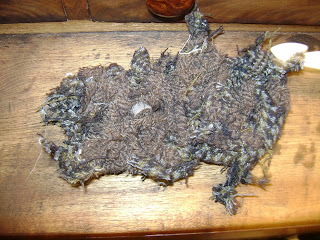
The bad crocheted version (looks kind of like a rats nest):


Another great flea market find.  I got these two rhinestone pieces, a brooch and a set of clip on earrings for $6.00 and I am trying to figure out what to make with them.  I don't think I have the heart to take them apart for the stones so they will probably stay whole and used in another way.  Check back again to see what I make from them!


Thursday, November 4, 2010

I should have just called this Ruffled Scarf Week

Last night I finished up the red scarf, which was definitely a learning experience.  I ended up cutting the scarf into two long scarves to lighten up the weight so it would help it ruffle up and I added 2 more rows of elastic thread and then clipped the edges to give it a frayed look and I think it turned out cute.  Fabric selection is key.  I think the red striped fabric was just too heavy!


Once I finished the red scarf, I started working on the "fancier" teal scarf which turned out very nice, but a little short.  The pictures don't really do it justice but by the time I finish making these its pretty late at night and I'm in no shape to take pictures of myself wearing them. : ) 


The inspiration for this scarf came from one I purchased at Isle of You (another great store, with lots of unique clothing) for $25.  This example cost of about $5, and the larger one will probably cost $10.  

I haven't forgotten about my furniture projects, I haven't made it back to Lowes yet, hopefully I will have an update on them this weekend. Thanks for reading, I hope I have inspired you as well!