Monday, February 28, 2011

New Items added to my Shop!

I've added these great creations to my Etsy Shop!  Check them out!
Bedspring Bud Vase
Bedspring Bud Vase
Bedspring Star Tealight Holder
Music Note Wreath
Music Note Wreath


Yummy Health Breakfast - Crepes with Strawberries, Bananas and Nutella

This weekend I didn't accomplish everything I wanted to, but there is always next weekend!  I did get to go snowmobiling which may be the last time this year since it is raining today, which I'm not sure if I am happy or sad about the rain.  Anyways, sunday morning I had the BF's mom and grandma over for breakfast since he was working and decided to make crepes.  Crepes are actually very easy to make and can be a healthy alternative to pancakes. Check out the recipe below from Prevention.


PREP TIME: 25 MINUTES + 1 HOUR RESTING /COOK TIME: 35 MINUTES / MAKES 4 SERVINGS

The key to successful crêpes is a pan that allows the crêpes to release easily without sticking.
Crêpes can be made ahead of time, separated with foil, parchment, or waxed paper, then
wrapped and refrigerated until ready to use.

CRÊPES
1/2 c all-purpose flour  (I used King Arthur Whole Wheat White Flour)
1 Tbsp sugar (I used Splenda)
1/8 tsp ground cinnamon
1/8 tsp salt
2 large eggs
1 c fat-free milk

FILLING
2 c strawberries, sliced
1 banana, sliced
2 tsp sugar (I used Splenda)
1/2 tsp vanilla extract
4 Tbsp chocolate hazelnut spread, such as Nutella, warmed  (I used less, only lightly coated each crepe)


 1. TO MAKE THE CRÊPES: Combine the flour, sugar, cinnamon, and salt in a bowl. Whisk together the eggs and milk in a separate bowl. Whisk the egg mixture into the flour mixture until well combined. Cover and let rest in the refrigerator for at least 1 hour or overnight. (I didn't let mine rest and they came out fine)

2. PREHEAT the oven to 275°F. Coat a large baking sheet with cooking spray.

3. COAT a nonstick crêpe pan or 8" skillet with cooking spray and heat over medium heat.Pour 3 tablespoons of crêpe batter into the pan, tipping to coat the bottom evenly.Cook for 1 to 1 1/2 minutes per side, until lightly browned. Repeat 7 more times with the remaining batter. Stack the crêpes as you work and cover to keep warm.

4. TO MAKE THE FILLING: Combine the strawberries,banana, sugar, and vanilla in a medium bowl.

5. ARRANGE the crêpes on a work surface. Spread each with 1 1/2 teaspoons chocolate-hazelnut spread in a straight line across the center. Top the spread with 6 tablespoons of the strawberry mixture, then roll up jellyroll style. Transfer the crêpes to the baking sheet, seamside up. Bake for 9 to 10 minutes, until the filling is warm.


Nutritional Info Per Serving: (1 serving = 2 filled crêpes)
280 cal, 9 g fat, 2.5 g sat fat, 135 mg sodium, 44 g carb, 3 g fiber, 9 g pro, 10% calcium

In my version by using Splenda, I came out to about 220 calories and I had a small glass of juice, so my breakfast totaled about 300 calories and for Sunday breakfast that is not bad at all, and boy were they tasty!

Saturday, February 26, 2011

Words for the Weekend

Let the great world spin - A cheerful fine art carnival photograph
Print available to purchase in Irenesuchocki's Etsy Shop


"Weekends are a bit like rainbows; they look good from a distance but disappear when you get up close to them" - Anonymous

Friday, February 25, 2011

Happy Friday! Recycled Jar w/ Chalkboard Label and Upcoming Events!

TGIF!  This is the first weekend in a long time I haven't had something to do!  Unfortunately the BF has to work all weekend so I will be on my own.  I think I might try to re-organize my spare bedroom/shop b/c honestly there is no way anyone could possibly sleep in this room right now :).  I have already warned my little sister if she is coming to stay she needs to give me a weeks notice.   I totally destroy it every time I have a show to do, so I think its time for some organizing and hopefully a little creating as well.

What I have to share today is actually what I used to display my fabric/soda can/sheet music roses last weekend at the FFA Craft Sale.  I have been saving jars from food for awhile now and finally came up with a use for them that is rather easy, but cute.  Using the same idea as my upcycled mail holder I taped off a square section on to each jar, painted it with a layer of white paint and then several layers of chalkboard paint.  I then let it sit overnight and voila cute reusable jars.  


Upcoming Shows
I just recently joined the Holiday Shopping Kick-off Fair which is a travelling fair that visits a different town each month and includes some of your favorite vendors, such as Avon, Scentsy, Pampered Chef, Gold Canyon Candles and so many other great local vendors.   The next fair is Saturday, March 12th from 3 pm - 8 pm at the Massena American Legion.  Become a fan on Facebook to know when we will be in your town!

I also signed up for another craft sale to benefit the Canton Day Care Center.  This should be a rather large one b/c they have 4000 square feet for vendors to set up.   This show is Saturday, March 19th from 9 am - 3 pm at the Canton Day Care Center at 205 State Street Road in Canton.  There will also be several raffles to win items so check it out!


Thursday, February 24, 2011

Recycled Newspaper Origami Seed Starter Pot

As you may have noticed by yesterday's post I have a lot of planting to do!  Year's in the past I have just used the jiffy seed starting trays and while they do work well, I just don't like to buy them and I wish they were a little larger to let the roots get larger.  This year I started looking for a DIY version and stumbled upon etsy seller lovebybean's version and remembered a tutorial on 
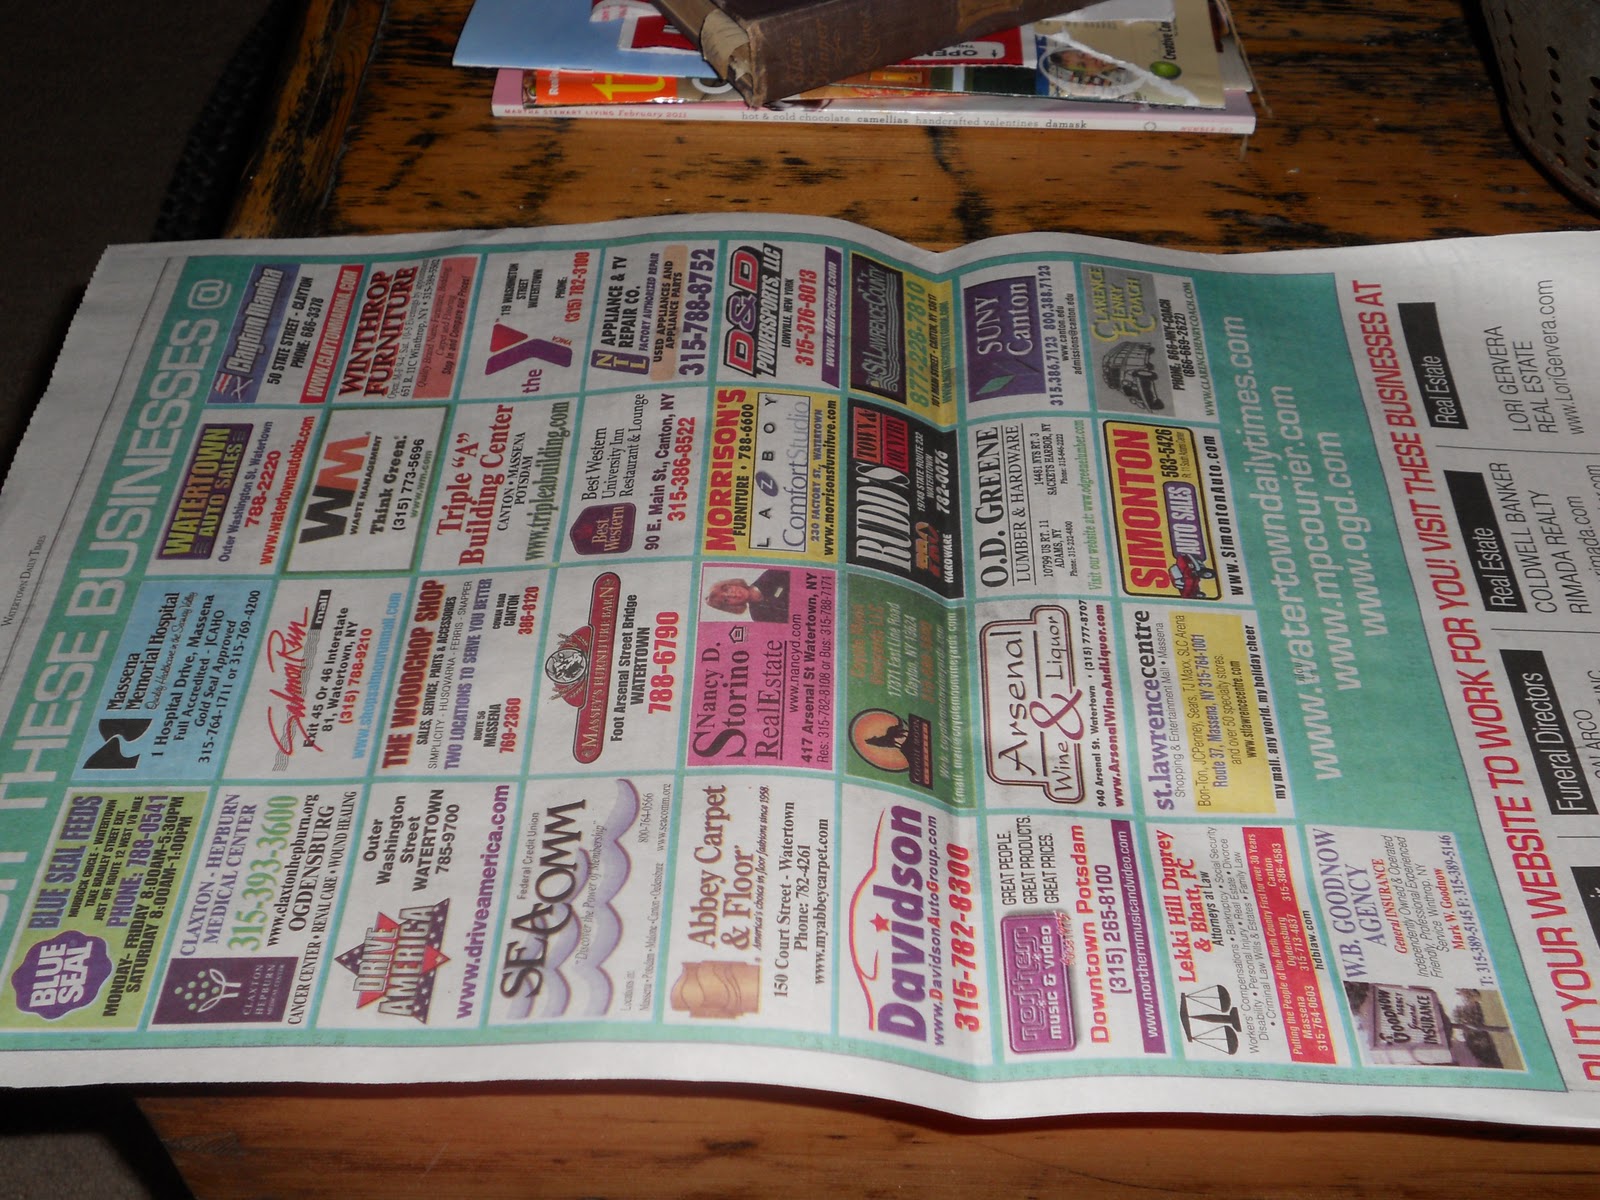
Netflix Origami for a box.  If you have never been to Netflix Origami its a neat site to make things out of a Netflix wrapper, and it is actually where I first started to learn origami.  I took yesterday's newspaper out of the recycle bin at work and brought it home to make some seed starter pots of my own.

So you will need:

1. Newspaper
2. Hot Chocolate with Peppermint Marshmallows :) (Optional)

So working at my normal station of the coffee table trunk in the living room, I started by taking one page of the newspaper.


Fold the short site to the top to create a triange and then cut off the excess, leaving a square of newspaper. 


Follow the instructions on Netflix Origami for just the box, not the lid too (unless you want lids).  

The end result:  


Too bad I still have way too many to fold!  Once the seedlings are ready to be planted outside, just put the whole newspaper box in the ground and it will break down and leave nutrients in the soil for your flowers!  

Enjoy!

Wednesday, February 23, 2011

"Earth laughs in flower." ~ Ralph Waldo Emerson - When to start your flowers inside!

Along with all the other things I enjoy doing, I love to garden as well, both flowers and vegetables.  Last year I started about half of my plants, including zinnias, snapdragons and roma tomatoes.  All of it turned out great and I felt so accomplished.  I also canned at least 35 quarts of homemade spaghetti sauce from my tomatoes which we are still enjoying now!  I grew several large pumpkins as well.  

large and small zinnias, lilies and glads


This year my hope is to start all my own flowers as well as again start all my tomato plants.  For flowers,  I plan to start pansy, begonia, snapdragon, dahlia, black-eyed susan, zinnia, cosmos, sunflowers and morning glories.  This may seem rather ambitious but I think I can do it.  Years in the past I haven't done any research on when to start plants but this year I changed that and now I have a plan in order.  According to the almanac, the last frost date for Northern NY can fall between May 1st - May 31st, so I set my tentative planting day as May 22nd and then did some research about how many weeks plants should be started before they are put in the ground and came up with the below planting schedule.  
PlantWeeksStart Date
Pansy12-142/26
Begonia12-142/26
Snapdragon8-103/13
Dahlia8-103/13
Black Eyed Susan8-103/13
Snapdragon8-103/13
Tomato8-103/13
Zinnia4-64/10
Cosmo4-64/10
Morning Glory4-64/10
Sunflower3-44/24
Check back tomorrow for a recycled seed starter pot!

Tuesday, February 22, 2011

Weekend Recap - FFA Craft Show


Sorry I decided to take yesterday off from blogging, but today I wanted to share how the FFA craft show went this weekend.  Unfortunately, the lovely weather in Northern New York decided not to cooperate and it was cold, windy and snowy so not many people ventured out which I really can't blame them, it was a good day to stay inside!  I did however sell a couple hand-painted butterflies as well as a wreath and spread the word about what I do.


Friday, February 18, 2011

Happy Friday! FFA Craft Show in Canton and A Cute Spring Bud Vase

It's finally Friday and boy has it been a long week.  Yesterday I took a trip to the Best Friends Thrift Store that benefits the Potsdam Humane Society.  Along with some $.50 scrap fabric, I found these super great glass jars, with a flip lid that look kind of vintage and I thought they would make a great bud vase in a bedspring.  I didn't have any way to test them until I got them home but here are the results:  


I was only able to find 4 of the jars so I will be keeping one for myself and selling the other 3 this weekend at the Canton FFA Craft Sale Saturday from 9 to 3 at the Canton School.  I also created a new type of rose, using soda cans but I glued old sheet music to them and then shaped them into flowers.  A totally recycled idea, with a vintage twist. 

I also just wanted to share the gorgeous flowers my wonderful BF got me for valentines day.  I love sunflowers more than roses! 


Thursday, February 17, 2011

For all the junkers out there! Check out JunkMarketStyle.com!

This is a great site to show how one person's junk can be another person's treasure.  This is a community for people who like to create using junk, so of course I was a perfect fit.  Some of the projects are so creative!  Check it out, my bedspring star candle holder and Love are on there!


Wednesday, February 16, 2011

Springs n' Things joined the Holiday Shopping Kick Off Fair

Recently I was told about a group of vendors that go around to a different North Country town once a month to showcase their items.  I thought it was an excellent idea and would spread the word about what I do, so I requested to join and have been allowed.  I will be at the Massena VFW from 3 pm - 8 pm on Saturday, March 12th.  I will be sure to let you know where and when for future fairs!

If you would like to become a fan of the FB page and receive updates about where they will be and what other vendors will be there as well, check out http://www.facebook.com/pages/Holiday-Shopping-Kick-Off-Fair/150635588306969?v=wall.

Don't forget about the FFA Garage and Craft Sale this Saturday, February 19th from 9 AM - 3 PM at the Canton School!

Tuesday, February 15, 2011

A Little Shining Star - Bedspring Star Candle Holder

I have re-worked my chubby little star from yesterday's post into a cute star candle holder!  Using springs, I attached a small glass tealight holder to bottom section of the star.  I then tied a tattered strip of muslin to the top with a bow to hang it from.  It really is so much better than the pictures, but take a look:   


Check out this and some of my other creations at the Canton Winter Festival FFA Garage and Craft Sale, this Saturday, February 19th from 9 AM - 3 PM at the Canton School!

Monday, February 14, 2011

Second Craft Show: Check out my stuff in person!

Springs n' Things will be at the Canton Winter Festival FFA Garage & Craft Sale!  This Saturday, February 19th from 9 AM - 3 PM , so stop by and check out my items in person.   They look so much better then the pictures!

New Bedspring Stars - One Chubby, One Tall

Aim for the moon. If you miss, you may hit a star.  - W. Clement Stone

While sitting down on the floor in the living room with my pile of springs, I created these two new stars!  One is a chubby little guy and the other is taller.  The pictures don't really do them justice, I am still working with them, but thought I would share my results so far!

The Chubby Bedspring Star
The Tall Bedspring Star

Friday, February 11, 2011

TGIF - Happy Weekend - Recycled Can Rose Magnets

I am now always on the lookout for interesting cans that I could make into roses.  I found some Diet Cranberry Sierra Mist cans and loved the look of them as roses, so I made them into magnets, by coiling up the stem and hotglueing a round magnet to the back.  Check them out!


Thursday, February 10, 2011

Junk Picking - My Latest Finds & Chalkboard Mail Holder

Remember how I find the board for my Springs n' Things Sign, well I also found some other interesting objects.  My grandmother used to run an antique shop out of that section of the barn and I think these were some of the leftover items that have since gotten a little rusty and dirt!

Rusty Coffee Pot, Wall Holder, 3 Insulators (1 clear, 1 blue, 1 turquoise), Atlas Mason Jar, and a Rusty Grater, 2 old locks
I already love any kind of mason jar, they can be used for so many great things.  Check back for projects using the others!

 I decided to work with the wall holder first b/c I currently hate the box holding our mail and needed something smaller so I would be forced to clean it out sooner and it wouldn't get out of control.  To add a little pizazz I decided to create a chalkboard label using chalkboard paint of course.  I cleaned up the wall holder a bit and lightly sanded it to get a little of the rust off.  I then, using blue painter's tape, taped off the rectangle I wanted for the label.  I put a heavy quote of white paint on for my base layer and then 2 layers of chalkboard paint. 


I let that sit for an hour or so and then I removed the tape.  


It had to for at least 24 hours to cure before you can write on it, but here is the finished product: 


Not only can this be used in your house for mail but by having a changeable label it can be used at parties and weddings!


Wednesday, February 9, 2011

Winter Hobby 2: Snowshoeing

I had been snowshoeing many times before this post, but I kept forgetting to bring my camera. Right now where I live we have more snow than we have had in years. Monday it was a nice 35 degrees so I decided to take the dogs snowshoeing. This is great exercise for dogs and people. My dogs just love it in the woods where they can run and play. I consider snowshoeing more fun than exercise, so if you haven't don e it before! Give it a try!

Down the road from our house


Bubba and Annie racing!


Annie taking a breather!  My poor chubby little beagle/spaniel!

Bubba relaxing with a faux hawk!

Tuesday, February 8, 2011

You see things and say "Why?" But I dream things and say "Why Not?" ~ George Bernard Shaw

For those of you who didn't get to see my items at the craft show, I uploaded photos of them to Flickr and created a cute slideshow so you can check them out as well. All items have been listed in my Etsy Shop, so if you are interested in any of them please let me know and we can make arrangements for delivery, so there will be no shipping charges!

Monday, February 7, 2011

My Weekend Recap: My first craft show!

I think my first craft show was a success!  It was small with only about 15 vendors which was great for my first time.  I sold 6 wreaths and several other smalls things for a total of $175 :), which will all go to moving forward with my creating.  I have several great ideas, some that people gave me at the show and others I have recently thought up, but I think you will all love them!

Here are some photos of my booth:


It was really hard to get good shots in there but I did have a great view of the St. Lawrence river!

Friday, February 4, 2011

Happy Weekend - Save yourself the hassle and don't buy this product!

I am still gearing up for my first craft show and I began working on a butterfly wreath.  A similar idea to the soda can rose, but using butterfly punches.  Below is what I was trying to end up with.


For the smaller butterfly's I used Martha Stewart's small butterfly punch and had no issues at all.  I would have ordered Martha Stewart's large butterfly punch but it wasn't going to be here in time for this weekend, so I ordered Tonic Studio 928 Butterfly Flutter Lever Punch.

Tonic Studios 928 Butterfly Flutter Level Multi Detail Punch

Since I hadn't had any trouble any of the other punches (stars, smaller butterflies, and of course the seal) I didn't think this one would have a problem either.  So I tried it and it got stuck.  I finally got it free and it was a mess and unusable.  I tried it on a piece of paper and it did the same thing.   Needless to say I was very angry at this point, that it wouldn't even work on paper.  I couldn't send it back b/c I wouldn't get a new one in time so I decided I was going to make this one work  I took the small screws out of the bottom and pried the top off, leaving just the two plates on the inside below.  I placed the piece of can where it would normally go and put the top plate on and pushed down on it.  It cut the shape perfectly, but the butterfly was stuck to the top plate this is why it kept getting stuck and ripping.  I took a small screw driver to pop it loose and now I have a way to make my butterflies for the weekend.  DO NOT BUY this product, I will definitely be purchasing Martha Stewart's large butterfly punch for future projects!


On a positive note, at least by taking this thing apart I got 4 cute little springs :).

Happy Weekend - Save yourself the hassle and don't buy this product!

I am still gearing up for my first craft show and I began working on a butterfly wreath.  A similar idea to the soda can rose, but using butterfly punches.  Below is what I was trying to end up with.


For the smaller butterfly's I used Martha Stewart's small butterfly punch and had no issues at all.  I would have ordered Martha Stewart's large butterfly punch but it wasn't going to be here in time for this weekend, so I ordered Tonic Studio 928 Butterfly Flutter Lever Punch.

Tonic Studios 928 Butterfly Flutter Level Multi Detail Punch

Since I hadn't had any trouble any of the other punches (stars, smaller butterflies, and of course the seal) I didn't think this one would have a problem either.  So I tried it and it got stuck.  I finally got it free and it was a mess and unusable.  I tried it on a piece of paper and it did the same thing.   Needless to say I was very angry at this point, that it wouldn't even work on paper.  I couldn't send it back b/c I wouldn't get a new one in time so I decided I was going to make this one work  I took the small screws out of the bottom and pried the top off, leaving just the two plates on the inside below.  I placed the peice of can where it would normally go and put the top plate on and pushed down on it.  It cut the shape perfectly, but the butterfly was stuck to the top plate this is why it kept getting stuck and ripping.  I took a small screw driver to pop it loose and now I have a way to make my butterflies for the weekend.  DO NOT BUY this product, I will definitely be purchasing Martha Stewart's large butterfly punch for future projects!


On a positive note, at least buy taking this thing apart I got 4 cute little springs :).