I know I haven't posted much lately. But as some of you may know I got engaged back in February and the BF and I are planning a June 14, 2014 wedding. I am making a ton of recycled projects for our big day, but I don't want to share them as I'm hoping for them all to be a surprise. Anyways, my flea market trips have continued as i search for more little lovelies to include at our wedding. I will continue to post on items I find, but decor posts will be limited.
I do however want to share progress on Bubba's training. As anyone with any type of terrier knows they LOVE to bark. Bubba is my silky terrier, that I got when he was just under a year old. Bubba had very little training before he came to us. Like all terriers, he is high strung and I'm pretty sure he has ADD. He has trouble focusing and loves to bark (all the time). He loves to bark at the television which is becoming a particular annoyance. I think his favorite shows are Duck Dynasty and Bone Collector, but just about any hunting show or anything on animal planet will do. I have tried loud noises, high pitched beepers, the Thundershirt, and unfortunately our next step was a shock collar but I just didn't have the heart. All of the above things worked briefly, but he got use to them so not a long term solution.
With the BF and I now talking about children in our future, I knew we were going to have to do something with Bubba. I had reached out to a few local training clubs, but was told he would not do well in a group session since he is an adult dog and would need individual training, which has been hard to find in Northern NY. On one of my flea market trips, while walking back to my car I saw the sign on a car door for 4 Paws Training. I found her contact info on Facebook and called that day! Maureen is owner of 4 Paws and we setup a consultation at my home so she could meet bubba in his environment. Everything went great at our consultation, I was so impressed when Maureen was able to get Bubba to sit within a couple tries, something the BF and I have tried many times before. Basic training seems to be the key to getting Bubba to stop barking, learning how to sit will eventually work towards him sitting on a mat/bed and staying until I release him, so if he is barking I will send him to his mat.
The best part is this is also training me, to be what Bubba needs. I successfully for the first time ever got Bubba to sit this morning 6 times, with only a little assistance. That is only with 2 days of training. I have been trying to work with him for 5-10 mins explicitly on training morning and night every day. Then I try little things in between, in his normal routine. Having such quick results has really inspired me that the barking will end!
Also Bubba doesn't really enjoy playing fetch must and some of his barking may be due to boredom. Bubba will play for maybe 5 throws if that and doesn't want to anymore, but I never know what he really wants from me. He wants to play but not fetch! I knew that silky terriers were bread for hunting mice, rats, squirrels and other small vermin. Which makes sense after he brought a dead squirrel onto our bed one night this winter! I ordered Bubba some squirrel scent and I am going to start hiding his toys for him to find, instead of fetch. I think he will love this! The scent should be here next week so I will give it a try and let you know how it works!!
For all the terrier owners, there is HOPE that your dog can stop barking too and professional training is so worth the money!
Friday, April 12, 2013
Tuesday, January 8, 2013
Collapsible Pinwheels For Sale in my Etsy Shop!!!
I just listed my first creation in a long time for sale in my Etsy shop!
I have started to make my collapsible book page pinwheels/rosettes in many different patterns! They are about 14 inches in diameter when opened and only 7 inches long and 1/2 inch thick when folded up. This allows for easy, safe storage when they are not on display!!
Check them out!!
I have started to make my collapsible book page pinwheels/rosettes in many different patterns! They are about 14 inches in diameter when opened and only 7 inches long and 1/2 inch thick when folded up. This allows for easy, safe storage when they are not on display!!
Check them out!!
Friday, January 4, 2013
My Queso Chicken
Yesterday I had gotten chicken out in the morning to do something with for dinner. I looked through my recipes and with it barely being above zero degrees here yesterday, most of them required me to go to the grocery store to get something, which was out of the question. On the ride home, I thought well what can I stuff it with that would be easy and tasty. Salsa came to mind and normally I like to put laughing cow in my chicken, but we are out of laughing cow :(.
Anyways, here is the recipe:
2 chicken breasts (approx 4 oz each - of course the BF's portion was more like 8 oz)
2 pieces of American Cheese (the yucky yellow kind - add another slice if your chicken is big)
Salsa
Panko
Directions:
- Preheat oven to 350 degrees.
- Beat the chicken until it is between 1/4 - 1/2 inch thick.
- Place a piece of cheese and enough salsa to cover the cheese/chicken evenly.
- Roll up your chicken and stick with a toothpick, the salsa will kind of squish out so don't roll it up too tight.
- Sprinkle with Panko (I crunched up a few doritos and sprinkled them too since we had them)
- Bake for 30 - 35 minutes or until chicken is done.
Thursday, January 3, 2013
Flea Market Find: Vintage Jelly Jars & Bed Springs
With nothing better to do on lunch yesterday I ventured down to one of my favorite local shops, North Country Neighbors. Not really searching for anything in particular, I had been on the look out for vintage jelly jars for at least a year and I finally found a set. I got a set of 4 for $3.00. I had seen them on Etsy, but the cheapest was $8 for a set of 4 with normally $10 shipping. It just didn't seem worth it to me and I knew they would pop up somewhere eventually.
The reason I wanted them so bad, is they fit perfectly inside a bedspring!
The uses are endless!
A cute vase....
or an interesting candle holder...
I am hoping to post more and more, so be prepared. I think I am back in recycling mode :)
The reason I wanted them so bad, is they fit perfectly inside a bedspring!
The uses are endless!
A cute vase....
or an interesting candle holder...
I am hoping to post more and more, so be prepared. I think I am back in recycling mode :)
Labels:
bed springs,
bedsprings,
flea market find,
upcycling
Wednesday, November 28, 2012
Remote Control Outlets
So this post was going to be about my christmas decorations, but my digital camera's battery won't take a charge AGAIN and my iPad camera just won't cut it for the pictures I want. So while I wait for Amazon to ship my new battery, I will share about this great little invention I stumbled upon while at Lowes looking for replacement C9 bulbs. I am always sick of climbing under the tree to plug it in. We had a button that you stepped on at one point to turn it on and that broke or is now MIA. For $20, I got 3 outlet adapters that you just plug in to your regular outlet. Each adapter has 2 plug-ins and you get 1 remote control to turn on/off all 3! Right now I have our tree and our front candle lights plugged into one and I will have my kitchen lights plugged in to the other 2. Now I can easily turn the lights on and off with the remote! It is so nice and super easy, no timers to figure out either or that don't work right!
Just a preview of my christmas decorations:
My silver chalkboard platter: (pardon the quality it was an iPad shot)
Just a preview of my christmas decorations:
My silver chalkboard platter: (pardon the quality it was an iPad shot)
Wednesday, October 31, 2012
A Thrift Store Find: C9 Christmas Lights - Thank You Best Friends!
Yes I know I have been really slacking on the blog posts but I hope to remedy that soon with some new exciting posts. To start with today I got a wonderful bargain on a box of C9 colored Christmas lights from Best Friend's thrift store in Potsdam. Those of you that don't know about this store, it is to benefit the Potsdam Animal Shelter. they do get some really interesting stuff too! Be sure to visit and like their Facebook page to receive updates on sales, free items and interesting new items. Anyways back to my bargain, without knowing how many were in the box or even if they worked I paid $3.00 for them all.
Upon going through the box initially expecting a huge mess of knotted up lights, I was pleasantly surprised. There were 14 strands varying length and all but 1 set worked. Now don't worry safety people I'm going to do a thorough check of all the strands before l use them for any projects. The one not working set may only need a new fuse. I really only wanted the lights for the stringers as a new c9 stringer runs anywhere from $12 - $15. Quite a few of the bulbs were out on some strands, but plan to replace the bulbs with clear c9 bulbs, possibly round ones and make something like this:
I found this wonderful tutorial on the Ruffled Wedding Blog for Vintage Marquee Lights! It seems easy enough and a could be a total upcycled project. Watch for my upcycled version of this tutorial using cardboard and cereal boxes!
I also got another great deal on 6 sets of plain white regular Christmas mini lights for a dollar and all of those sets worked. The BF even said I got a good deal! The c9 lights updated with clear bulbs and the mini lights will be gorgeous for a wedding and all for $4!
Friday, June 29, 2012
Pinterest Success: Recycled Star Jar Candleholder
Another Pinterest find that I just had to try. I had several small metal candle holders I had gotten probably over 10 years ago that have star cut outs that I just love. I had been trying to figure out a way to create my own and had a duh moment when I saw a pin that you just used the cheap foil star stickers on a jar (I used a pickle jar) and then spray paint over it. This is exactly what I did, I just used gold paint!
I just tied a piece of twine around the top for added decoration! If you are really a recycler like me, you can keep the star stickers after peeling them off and reuse them on your next jar!
Next time I may try to do a gold mercury glass feel!
Wednesday, June 20, 2012
Life on a Silver Platter - My Upcycled Chalkboard Platter
After seeing something similar in a Pottery Barn catalog well over a year ago, I have been biding my time and keeping my eyes open while at thrift stores, flea markets and garage sales for the perfect platter. I found this lovely large silver plated platter at North Country Neighbors in downtown Potsdam for only $10!
The platter was tarnished when I got it, but all it took was a little elbow grease with a polishing cloth and now it shines! All I did was paint a layer of white paint as a base in the center of the platter and then 3 layers of chalkboard paint. Then I glued a long piece of beautiful red rose scrap fabric, with super strong permanent glue and as of this morning it was still hanging on the wall!
It is hanging right next to my dining room table and will be a wonderful place to highlight holiday/birthday messages!
I love it so much I may have to head back and pick up one of the smaller platters to make another!
Wednesday, May 16, 2012
DIY Chicken Wire Frame Tutorial
I kept seeing this pin on Pinterest. Which was basically just a link to a photo, no instructions how to make it or anything like that. I have had an old frame kicking around the house from a friend. It originally had a broken corner, that I glued back together but I still couldn't figure out what I wanted to do with it.
Last night, I decided to attempt my own chicken wire frame. Basically I cut my chicken wire a little bigger than the hole in the frame (I was able to cut mine with scissors). If your chicken wire is in a roll like mine you will have to kind of pull and stretch it out to flatten it. Then secure with thumb tacks!
If you don't have a loop in the chicken wire you may want to wrap some of the excess around the tack.
Finally, secure whatever you would like to on it, using strong magnets or clothespins!
Check back later this week, I will have a tutorial on how to make the lovely little book page flower in the lower right hand corner!
Last night, I decided to attempt my own chicken wire frame. Basically I cut my chicken wire a little bigger than the hole in the frame (I was able to cut mine with scissors). If your chicken wire is in a roll like mine you will have to kind of pull and stretch it out to flatten it. Then secure with thumb tacks!
If you don't have a loop in the chicken wire you may want to wrap some of the excess around the tack.
Finally, secure whatever you would like to on it, using strong magnets or clothespins!
Check back later this week, I will have a tutorial on how to make the lovely little book page flower in the lower right hand corner!
Tuesday, March 27, 2012
Recycled Jack Daniel's Bow Headband Tutorial
My friend, Mandy and I are guest bar tending this Saturday, March 31st at The Ole Smokehouse in Madrid to benefit Relay for Life. The event starts at noon with different bar tenders every hour. It is a lot of fun, teams dress up and have themes and its for a great cause so if you can, stop by and check it out. Mandy and I are the last ones from 5 - 6.
Inspired by the challenge I created these Jack Daniel's Bow Headbands made from the box that the 4-pack comes in! I tried to use the Jack Daniels Aluminum bottles but they are just to thick to be bent into a bow.
Anyways this could be done with any cardboard or soda can box, such as Coca-cola or food boxes. You easily could cover the box with scrap book paper for a pretty design as well.
So here they are:
Supplies needed:
Cardboard boxes with design you like
Scissors
Clothespin
Glue
Headband (I was lucky I found some at walmart on clearance, 5 for $1)
Step 1: Cut a section of the box apart with the design you want on the front of the bow is in the center and double the size of the bow you want. Ex. If you want a 3" bow make sure you have 6" to work with.
Step 2: Cut a strip the width you want your bow. Make sure again the design you want on the front f your bow is centered.
Step 3: Gently fold over the two ends, centering your design on the front of the bow. You DO NOT want to put creases in the ends or your bow will be flat! You can put a dot of glue on the back to hold this as well, but its not necessary.
Step 4: Cut a strip long enough to wrap around your bow to make the center portion. Again make sure the design you want to appear on top is centered. In this case we want to see the words "Old No. 7".
Step 5: Fold small strip cut in step 5 over the bow and secure with glue and hold tightly with clothespin until dry.
Step 6: Once it is dry, glue it to the desired location on the headband and hold with clothespin until dry. I normally try to glue mine a little to the side.
Inspired by the challenge I created these Jack Daniel's Bow Headbands made from the box that the 4-pack comes in! I tried to use the Jack Daniels Aluminum bottles but they are just to thick to be bent into a bow.
Anyways this could be done with any cardboard or soda can box, such as Coca-cola or food boxes. You easily could cover the box with scrap book paper for a pretty design as well.
So here they are:
Supplies needed:
Cardboard boxes with design you like
Scissors
Clothespin
Glue
Headband (I was lucky I found some at walmart on clearance, 5 for $1)
Step 2: Cut a strip the width you want your bow. Make sure again the design you want on the front f your bow is centered.
Step 3: Gently fold over the two ends, centering your design on the front of the bow. You DO NOT want to put creases in the ends or your bow will be flat! You can put a dot of glue on the back to hold this as well, but its not necessary.
Step 4: Cut a strip long enough to wrap around your bow to make the center portion. Again make sure the design you want to appear on top is centered. In this case we want to see the words "Old No. 7".
Step 5: Fold small strip cut in step 5 over the bow and secure with glue and hold tightly with clothespin until dry.
Wednesday, March 7, 2012
DIY Giant Whimsical Paper Flowers
I am not sure if I mentioned this in my previous blogs, but I am maid of honor in 2 weddings this spring and I have truly enjoyed being able to put my crafty side to work creating again. Not that I don't enjoy bed springs and recycling, but sometimes you just need to do something different.
I originally found this tutorial on Pinterest, the pin was from the Design Sponge website but the flowers were created by Ruche. Which if you are in love with all things vintage and have never been to Ruche, check it out they have beautiful clothes and decorative items. It is one of my favs!
Anyways so I followed the tutorial, but have a few notes on how I altered it for my creations.
1. When you are filling your cups with the cement make sure you have at least 3/4 of a cup, this will make them strong enough to hold up taller flowers. My current ones are about 1/2 a cup and definitely won't hold flowers any taller than the ones I'm showing (about 4' tall). I had to have a quick lesson from the BF in how to use quickcrete and strongly suggest before putting any cement powder in your cups add a tiny bit of water to the bottom, it definitely helps in the mixing process.
2. Instead of using stucco corner, I used chicken wire, which we had out in the barn (so I guess this is an element of recycling) It worked great and I didn't have to wire it closed I just bent it to the stem shape and taped it with masking tape.
3. Lastly, my flower tops are different b/c I attempt to make one like theirs and failed! Well not completely, but I didn't like the end result. It is very difficult to tape the flowers together b/c tape and tissue paper do not work well together. If it sticks, it rips! So I decided to use five sheets of tissue paper and create blossoms like I used in my phone book flowers. So much easier and created giant blooms! I also made the wire "stem" of my flower long enough that I just stick it in the large chicken wire stem and cover it, no zip ties needed.
4. For my centers, I took a darker purple tissue paper and cut it up with my fringe scissors, sprayed the centers with spray glue and dropped it on! Spray glue may also be a good option for glueing the green tissue paper to the masking tape, as using plain white glue is very time consuming.
The finished result:
They remind me of the giant singing flowers from Alice in Wonderland, while the BF says the remind him of the flowers that come up through the pipes on Super Mario. Either way excellent bridal shower, wedding or even to decorate your little girl's room!
Enjoy!
I originally found this tutorial on Pinterest, the pin was from the Design Sponge website but the flowers were created by Ruche. Which if you are in love with all things vintage and have never been to Ruche, check it out they have beautiful clothes and decorative items. It is one of my favs!
Anyways so I followed the tutorial, but have a few notes on how I altered it for my creations.
1. When you are filling your cups with the cement make sure you have at least 3/4 of a cup, this will make them strong enough to hold up taller flowers. My current ones are about 1/2 a cup and definitely won't hold flowers any taller than the ones I'm showing (about 4' tall). I had to have a quick lesson from the BF in how to use quickcrete and strongly suggest before putting any cement powder in your cups add a tiny bit of water to the bottom, it definitely helps in the mixing process.
2. Instead of using stucco corner, I used chicken wire, which we had out in the barn (so I guess this is an element of recycling) It worked great and I didn't have to wire it closed I just bent it to the stem shape and taped it with masking tape.
3. Lastly, my flower tops are different b/c I attempt to make one like theirs and failed! Well not completely, but I didn't like the end result. It is very difficult to tape the flowers together b/c tape and tissue paper do not work well together. If it sticks, it rips! So I decided to use five sheets of tissue paper and create blossoms like I used in my phone book flowers. So much easier and created giant blooms! I also made the wire "stem" of my flower long enough that I just stick it in the large chicken wire stem and cover it, no zip ties needed.
4. For my centers, I took a darker purple tissue paper and cut it up with my fringe scissors, sprayed the centers with spray glue and dropped it on! Spray glue may also be a good option for glueing the green tissue paper to the masking tape, as using plain white glue is very time consuming.
The finished result:
They remind me of the giant singing flowers from Alice in Wonderland, while the BF says the remind him of the flowers that come up through the pipes on Super Mario. Either way excellent bridal shower, wedding or even to decorate your little girl's room!
Enjoy!
Monday, February 20, 2012
Vintage Soda Crate Re-Do
Sorry for the lack of blogs lately, I was so burnt out after Christmas I am now finally getting back to making a few things here and there. Last week, I was sick of my vintage soda crates b/c the cubbies in them were so dark, you could barely see what items I had in them. I had an old copy of Alice in Wonderland I had found at a library sale and everyone knows how much I love it! So I took the pages out of it and glued them to cardboard from cereal box and put the cereal box in the back of the soda crate. They turned out so cute!
I like the crates so much better, you can see the colorful decorations I have in them even better. I actually made some changes as well. I have a ton of old wooden thread spools and to give them a pop of color I wrapped embroidery floss around them so they look original!
I also took some scrap fabric I had, ripped into into strips and wrapped it around some of the larger spools I had.
The heart shaped lock below is one of my latest finds at an antique shop in Lake Placid. It is in working condition and has a great decorative key! I love old locks, I am always on the look out for them!
I like the crates so much better, you can see the colorful decorations I have in them even better. I actually made some changes as well. I have a ton of old wooden thread spools and to give them a pop of color I wrapped embroidery floss around them so they look original!
I also took some scrap fabric I had, ripped into into strips and wrapped it around some of the larger spools I had.
The heart shaped lock below is one of my latest finds at an antique shop in Lake Placid. It is in working condition and has a great decorative key! I love old locks, I am always on the look out for them!
Thursday, February 2, 2012
New decoration sets just in time for Valentine's Day!
Sorry I have been a little lax with my blogging lately, I have been super busy. I was in Pittsburgh all last week for a Google Analytics and Adwords training as well as working on finishing my Master's degree in Information Technology to graduate in Spring 2012!
But somewhere I found some time to make these two lovely decoration sets.
Wreath & Set - $32.00
Just the Set - $12.00
Wreath & Set - $32.00
Just the Set - $12.00
Hopefully I will find more time to blog some great tutorials next week! Have a great weekend!
Tuesday, January 10, 2012
New Recycled Book Page Banners Added to my Shop!
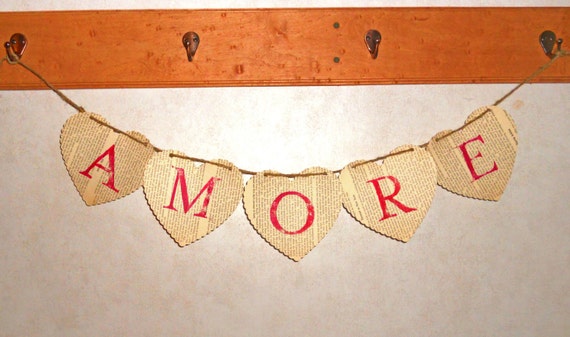
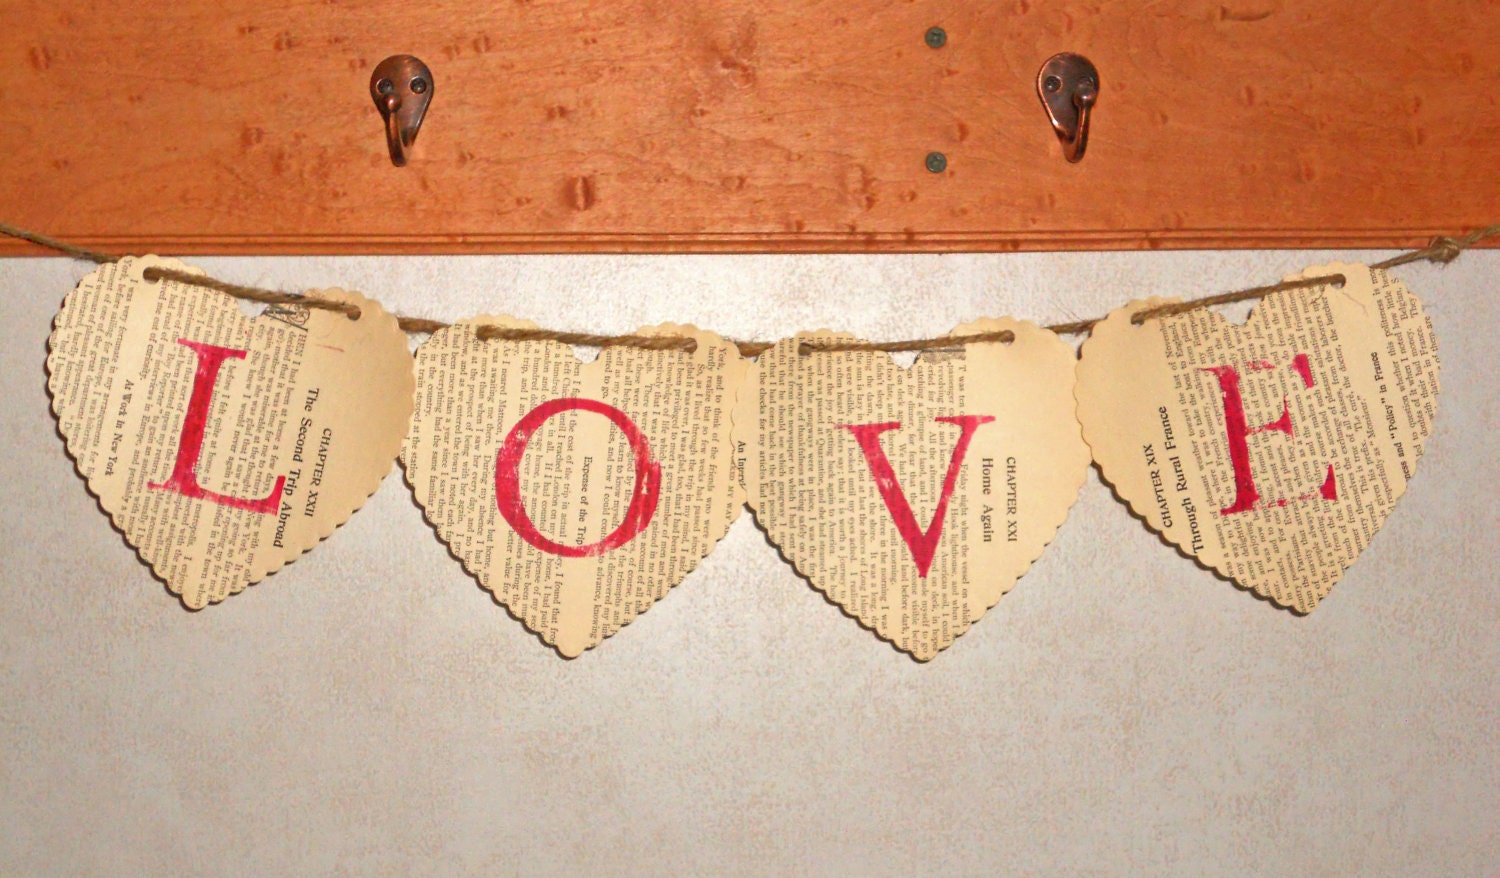
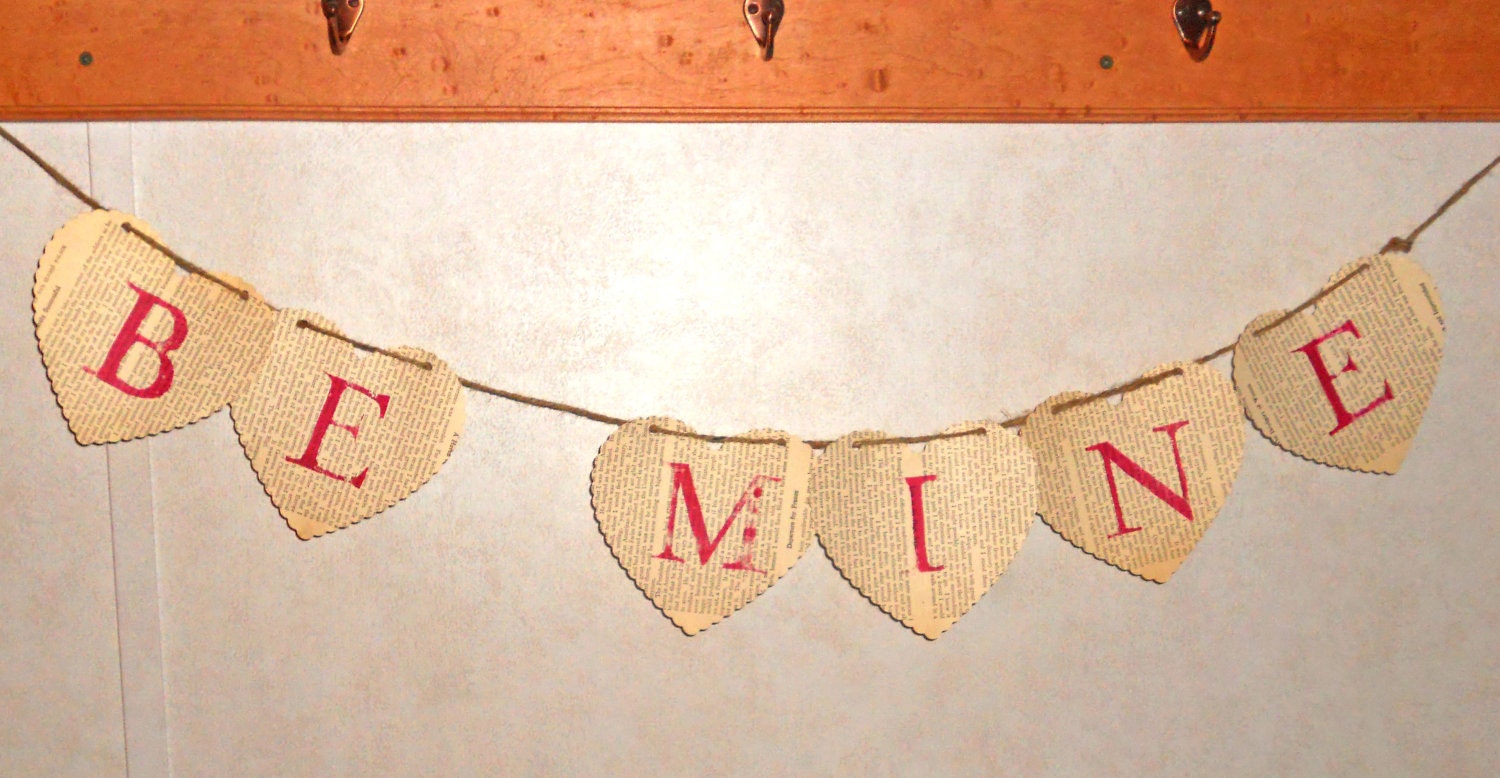
I got a wonderful set of scalloped heart dies for my Epic 6 Die Cutting Machine and the largest size heart is the perfect size for banners! So I made 3 this weekend to add to my shop! Hand-stamped in red and strung on twine, they are an adorable vintage style Valentine's Day decoration! Check them out!
"Amore" Banner - $10.00
"Love" Banner" - $8.00
"Be Mine" Banner - $12.00
I also do custom banners, in whatever color, saying or shape you would like for $2.00 a letter. That includes stringing it.
Enjoy!
Thursday, January 5, 2012
Dr. Pepper Rose Wreath at the Oddball Emporium
Today, I am dropping off a few wreaths to go on consignment at the Oddball Emporium in Potsdam. One of the decoration sets that will be available there are these cute Diet Dr. Pepper can roses! They are larger than my original roses b/c I am now creating them using my die cutting machine! Definitely a unique Valentine's decoration. Stop by the Oddball Emporium and check them out as well as a few of my other sets!
Wednesday, January 4, 2012
Die Cut Machine Soda Can Flowers
I started cutting soda cans with my Epic 6 Die Cutting machine before Christmas, but finally found the time to write a blog about it! Using the dies gives a more distinct look and greater size options than the hand punches. For today's tutorial, I am using a daisy style flower shaped dies from Lifestyle Crafts.
Supplies:
Die Cutting Machine (I use a Epic 6)
Cutting Mat
Flower Die Set
Soda Can
Scissors
Die Cutting Machine (I use a Epic 6)
Cutting Mat
Flower Die Set
Soda Can
Scissors
Step 1: Cut the top and bottom off of your can with the scissors cutting one the side of the can to leave one large rectangle.
Step 2: Arrange the dies you want to cut out on the cutting mat, make sure the arrangement is no larger than your can. I also added a thin piece of cardboard to my cutting matt to help it cut all the way through the can.
Step 3: Place soda can rectangle over top of the dies and then place the top of the cutting mat on top hold it together to make sure the dies don't slide!
Step 4: Send it through your die cutting machine! You may want to send it through twice especially if your dies have foam on them like mine.
Step 5: If necessary, carefully pop out flowers from soda can.
Tada! You should now have the layers for your flower. Glue them together to create the finished look. You may also choose to slightly curl the edges to give it a more 3D look!!
Subscribe to:
Posts (Atom)