Friday, October 28, 2011

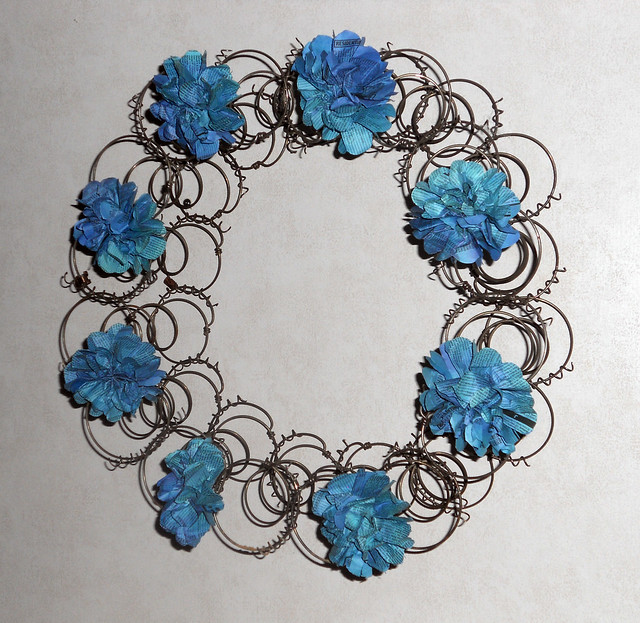
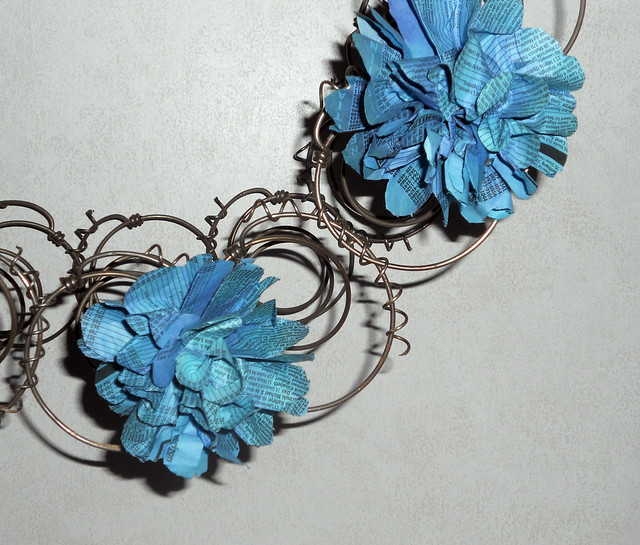
Blue Recycled Phonebook Hydrangea

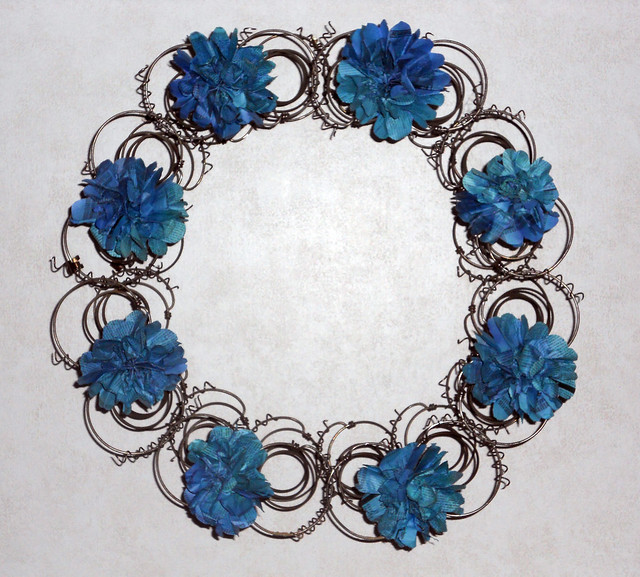
Continuing on with my phonebook recycling mission, I made a set of vivid blue hydrangeas.  I used the Wilton Gel food coloring which gives a much deeper richer color than liquid food coloring.  


These and several other different colors of hydrangea decoration sets will be available at the Upcycled Art Show this Saturday October 29th in the Cheel Commons at Clarkson University!  Stop by and check them out in person!  They are AMAZING!

Thursday, October 27, 2011

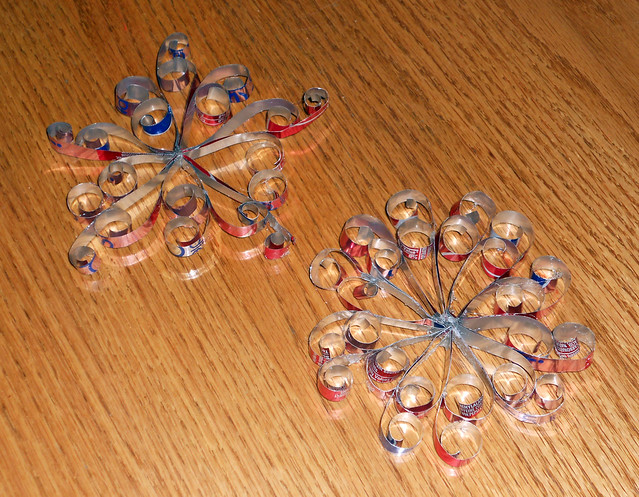
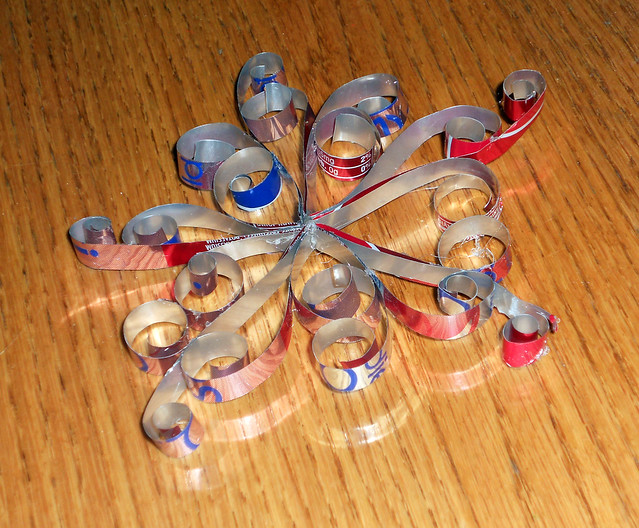
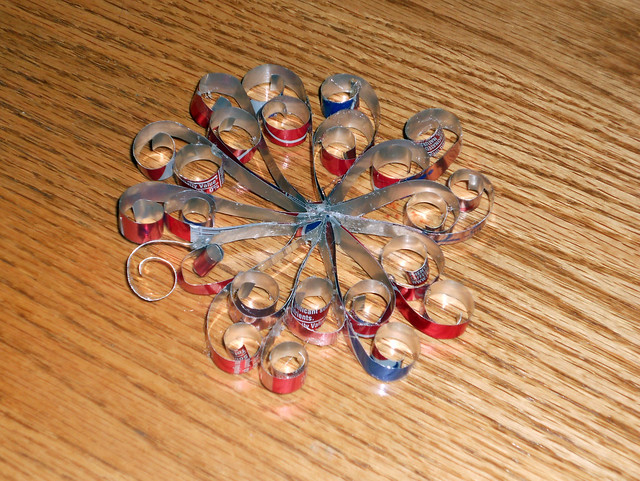
Quilled Soda Can Snowflakes

I had been working with quilling strips of soda can for awhile now and trying to come up with some decent shapes made out of them.  For those of you that don't know quilling traditionally is the coiling and shaping of narrow strips of paper into designs.  I decided to move this into a recycled effort and do it with soda can since soda can really has the ability to easily hold the shape.  Although a time consuming process I think the end result is wonderful.


 I hope to have some wreath decoration sets, ornament sets as well as individual ornaments made out of these for upcoming shows. 

Don't forget this weekend is the First Uniquely Northern NY Upcycled Art Show in the Cheel Commons at Clarkson University from 10 - 4.  We have 10 recycled artisans and crafters attending the show and it is sure to be one-of-a-kind!  Stop by and check it out!

Wednesday, October 26, 2011

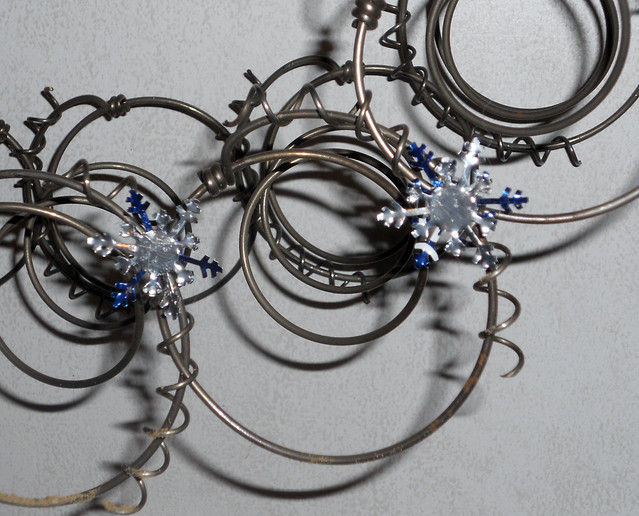
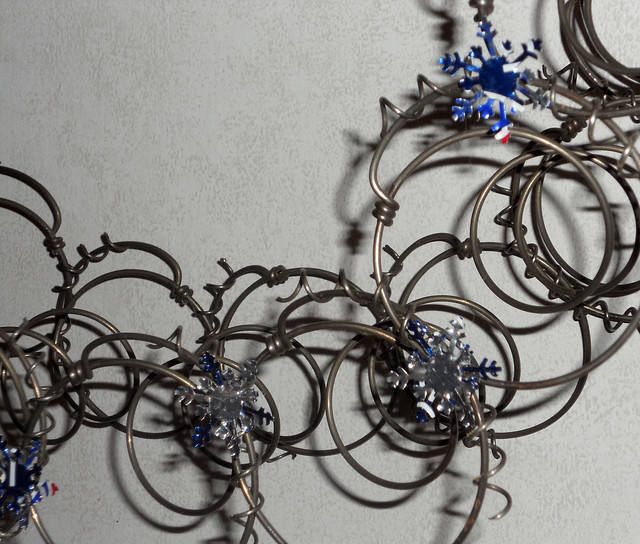
Recycled Soda Can Snowflakes

With snow in the forecast in Northern NY, what better way to welcome it than make some recycled soda can snowflake decoration sets for my bed spring wreaths.  I'm not sure I like this set b/c you can't really see them all that well.  They are only about 1 in x 1 in and the silver just doesn't pop that much, so I'm going to work on some others, but thought I would share these anyways.  I created the snowflakes using a Martha Stewart Snowflake Punch :).


It has been a crazy week!  I am getting everything together for the Uniquely NNY Upcycled Art Show this Saturday Oct 29th from 10 - 4 in the Cheel Commons at Clarkson University!  As of right now I have 11 artisans that recycle signed up!  


Monday, October 24, 2011

The Brain Hemorhage Cupcake & the Cuisipro Cupcake Corer

I took last week off from blogging b/c life has been absolutely crazy, with craft shows, our Halloween party and work!  But I'm back and ready to share some great Halloween stuff!  Below are the Brain Hemorrhage cupcakes I made for our Halloween party.  They were super easy, a white cake mix, a can of buttercream frosting, a little red food coloring, and some strawberry pie filling.  Of course, I can't forget about the one key item, the Cuisipro Cupcake Corer.  


This little gadget at only $5 is definitely worth it.  I baked the cupcakes as normal let cool completely and then you just screw the corer down into the cool cupcake and pull out the center piece.  Fill with pie filling and then frost with pink-tinted frosting.  I used a large round decorator to create a brain-ish looking top!  

Don't forget this weekend is the Uniquely NNY Upcycled Art Show in the Cheel Commons at Clarkson University, Saturday October 29th from 10 - 4.  I will have a new assortment of Thanksgiving and Christmas/Winter Decoration Sets for my Banners and Wreaths!

Friday, October 14, 2011

The UGG Boot Dying Project - Trial 1

Everyone who lives through the salty North Country winters knows it reeks havoc on Ugg boots.  My brown pair, which are going on 3 years old and still in great shape other than the lighter spots on the toes from the salt.  I would consider this first trial semi-successfully my Uggs are a little darker, but still not what I want them to be, so I will have a Trial 2 to post later.  

My Uggs before:


Step 1:  Soak your Uggs with Hot Water
Step 2:  Fill a large bucket with hot water (I did this in the tub and then brought it outside to prevent a mess)
Step 3:  Add bottle of dye and stir with a stick to mix in and then add your uggs (you may have to like wedge them down with something to make sure they stay all in the dye)
Step 4: Let soak for 30 - 40 minutes
Step 5: Rinse (This is where I think I went wrong, I rinsed mine immediately with cold water from the hose and I think I should have down it in the sink with hot water then going gradually to cool, I am going to try this  in Trial 2)
Step 6.  I stuffed my Uggs with newspaper to keep them standing up and to help them dry, they will take several days to dry.  

The finished product: (ignore the grass)


They dont' look too much darker in the picture but to the eye they are a shade darker.  I will be trying this again though so watch for my results from Trial 2!
Wednesday, October 12, 2011

Wedding Wednesdays: Think Nature

This photo would make such a lovely background for engagment photos, maybe with just a few more leaves on the trees.  I took it last night of the road in front of our house.  Today's post is to get others to look at the natural beauty all around them when deciding how and when to do photos.  Now this road is beautiful at all times of the year, freshly fallen snow to the green leaves of spring, but nothing beats maple trees in the fall.  This wasn't even one of the best years for colors and they are still amazing   


I wanted to share some other great photo ideas from around  the web:
Pinned Image
From ordyandjoon.blogspot.com
Pinned Image
From forgetmeknotweddings.com


Pinned Image
After a fresh fallen snow, possibly a little freezing rain to coat the branches.

Tuesday, October 11, 2011

Upcycled Door Knob Pumpkin


The inspiration for this actually came from a the other half of the white porcelain door knob leftover from creating my Upcycled Door Corner Display. It had been lying around since then and while looking at it one day, I decided it kind of looked like a little white pumpkin.  I didn't want to paint that one, but wanted to do a test run on another rusty metal door knob I had from a pair of doors I bought not to long ago.  All I did was paint it orange and then a little green paint for a stem.  I added a little wire corkscrew curl to top it off.  I think it is adorable and would make a lovely paper weight!


I'm not crazy about the paint I used for the stem so I may look for a different kind and do it with a little more detail!

The pair will be for sale at my first show in Malone, this Saturday October 15th for the All You Harvest Festival at Davis Elementary!

Friday, October 7, 2011

Recycled Sammy from Trick r' Treat

If you have never seen the move Trick r' Treat I totally suggest it.  It is one of the scariest movies I have seen in recent memory.   One of the scariest little guys is Sammy, here is my recycled version:


Now he is not completely finished, but I thought I would share my progress so far.  His body is made from a children's feety pjs that one of my co-workers brought in for me.  That I dyed orange.  His body is made from old fence wire, so he is positionable and he is stuffed with plastic bags.  The portion holding his head up is a paper towel roll and again his head is burlap stuffed with plastic bags.  I hand stitched his mouth on with twine and stitched on 2 old black buttons I already had.


I still need to finish his hands, more coloring on the face, patches on his costume, and other accessories, but I think he is a pretty scary.  He is sitting in an antique kid's rocking chair in the living room and I get freaked out every time I walk by it.  I told the BF he may have to go live in the garage until the Halloween party.  I also told the BF who absolutely loves to scare me that he is banned from moving Sammy.  


I will be at the 25th Annual Crary Mills Craft Show this weekend from 10 - 4 at the Tri-Town Community Building on Post Road in Crary Mills! Stop by!

Thursday, October 6, 2011

Creepy Bloody Recycled Jar Lanterns

 I love Halloween and all things scary.  I have been working on decorations for the BF and my upcoming Halloween party and here is a great one I came up with.  This is super easy and I think really really scary.


Basically, I took a bottle of white elmer's glue and add a few knife tips of the red gel food coloring (found in the cake decorating stuff).  I did an entire bottle b/c I'm making a bunch of these, you could also mix it in smaller batches.  Stirred it around with a wooden skewer and took my clean recycled jar, placed it on wax paper.  Took the glue bottle, with my now red glue and filled just the threaded rim of the jar with glue and let it drip down the jar.  Let it dry and it will have a nice bloody look!


Wednesday, October 5, 2011

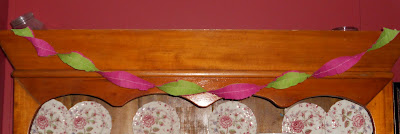
Wedding Wednesdays: Colorful Ruffled Crepe Paper Tutorial

I found a tutorial a long time ago on how to make this, but I couldn't find it again to link to so I made my own.  Ruffled crepe paper is a cheap and super easy decoration alternative.  I made a bunch of it last fall for the BF's Grandmas 80th birthday party and it was a hit.  It looks 10x nicer than plain crepe paper.  I wish I had taken photos of it from her party, but unfortunately as normal I forgot.


Step 1:  Choose your colors!  These could be your wedding colors or accent colors.  For this tutorial I chose lime green and fuschia.  You can also use three colors and just cut it into long strips and inter mix the three, a little more challenging but that is how I did the red, yellow and orange combo above.


Step 2: Get out your sewing machine! Using a basic straight stitch, layer your crepe paper one over top of the other.

\

Step 3: As you are sewing along, gently give the crepe paper a little push so that it folds a bit and sew over the fold.  This will leave a nice ruffle, kind of messy ruffle!


Step 4:  Keep sewing until you get your desired amount, it really isn't a labor intensive process just tedious!  If you know how long you need your streamers to be for decorating I would pre-measure and cut strips of the crepe paper to sew, just make sure you add a little extra to cover the ruffling.


There are so many uses for this beyond just streamers, it could be tied to chairs or laid on a table as a fun runner.  I have even used it to decorate gift packages!

Enjoy!

Tuesday, October 4, 2011

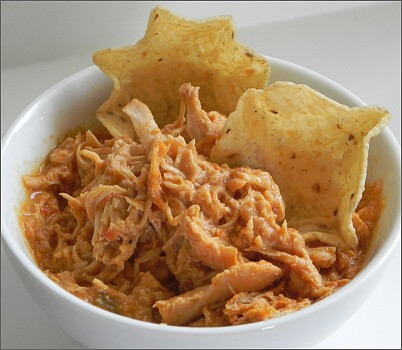
Crockpot Salsa Chicken

This recipe is amazing and once again a Pinterest find!  The BF and I absolutely love it!  We got 2 meals out of it, the first was chicken tacos the second was chicken nachos!  I have the say it worked even better as nachos than tacos!  Would also make an excellent taco dip for a party.

salsa chicken
Photo Credit: Amanda's Recipe and Beauty Finds

I didn't have to adjust this recipe at all, it was perfect as is.  


Ingredients:
1 pound boneless, skinless chicken breasts
1 can cream of chicken soup
1 cup salsa
1 package taco seasoning
1 cup sour cream
Directions:
1.  Mix soup, salsa and taco seasoning in the bottom of your crockpot.  Sink chicken breasts into the mixture, covering completely.  Cook on low for 5 – 6 hours depending on size of chicken breasts.
2.  Remove chicken, shred and return to the crockpot.  Add sour cream and mix well.  Heat until everything is warmed through.

Absolutely Delicious!  Give it a try!